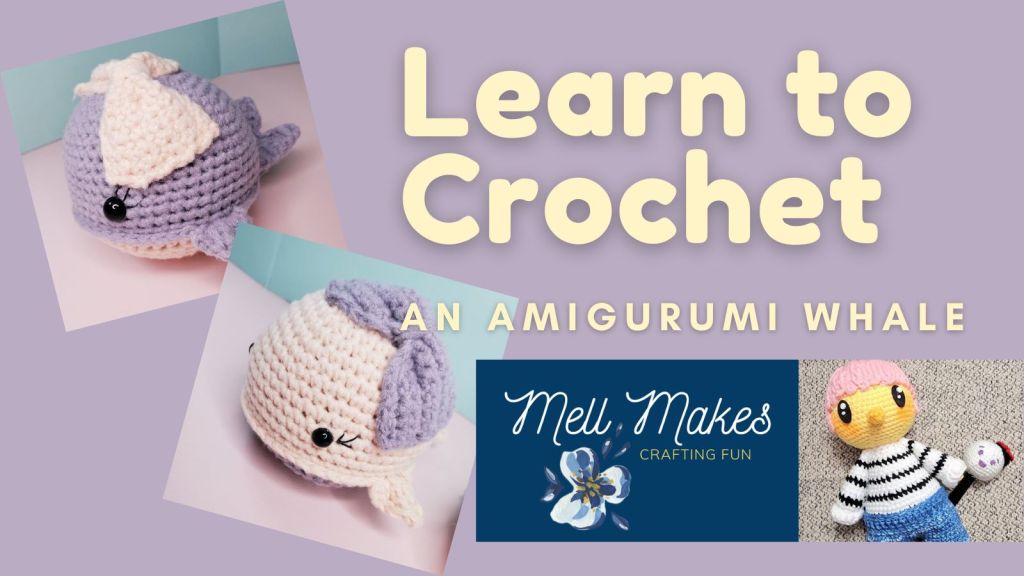
Welcome to Lesson 1!
This series will teach beginners crochet techniques and experienced crocheters my baby amigurumi whale pattern…FOR FREE!
Lesson 1
I’m going to provide a list of materials for the experienced crocheters. Then, I’m going to go through each material in detail for beginners. There’s a lot to know about yarn and hooks. Often, beginners are overwhelmed with all the choices out there. I want to break this down so that it is all easily accessible and understandable.
I will follow up the list of materials section by providing homework for beginners. Yes, you will have homework each week. You have to practice and practice a lot. I want you to understand something from the very beginning:
Crochet is hard in the beginning, but easy with practice.
Repeat this over and over. Along with the next mantra.
Mistakes are ok. Mistakes are how I learn. Mistakes can be fixed or I can begin again.
I have been crocheting over 30 years. I still make mistakes. I still rip out large amounts of crochet. I STILL cut yarn and begin again. The world doesn’t end. Mistakes don’t make you lesser than. Mistakes are normal and will teach you how to crochet better. They are necessary.
Now that we’ve had that talk…let’s get started.
Materials
- Yarn in two complementary colors (For beginners, I recommend using regular old worsted weight yarn. Don’t get fancy at first.)
- Crochet Hook (Below I will tell you how to choose the correct hook for your project. It really depends on the type of yarn you choose and how you crochet.)
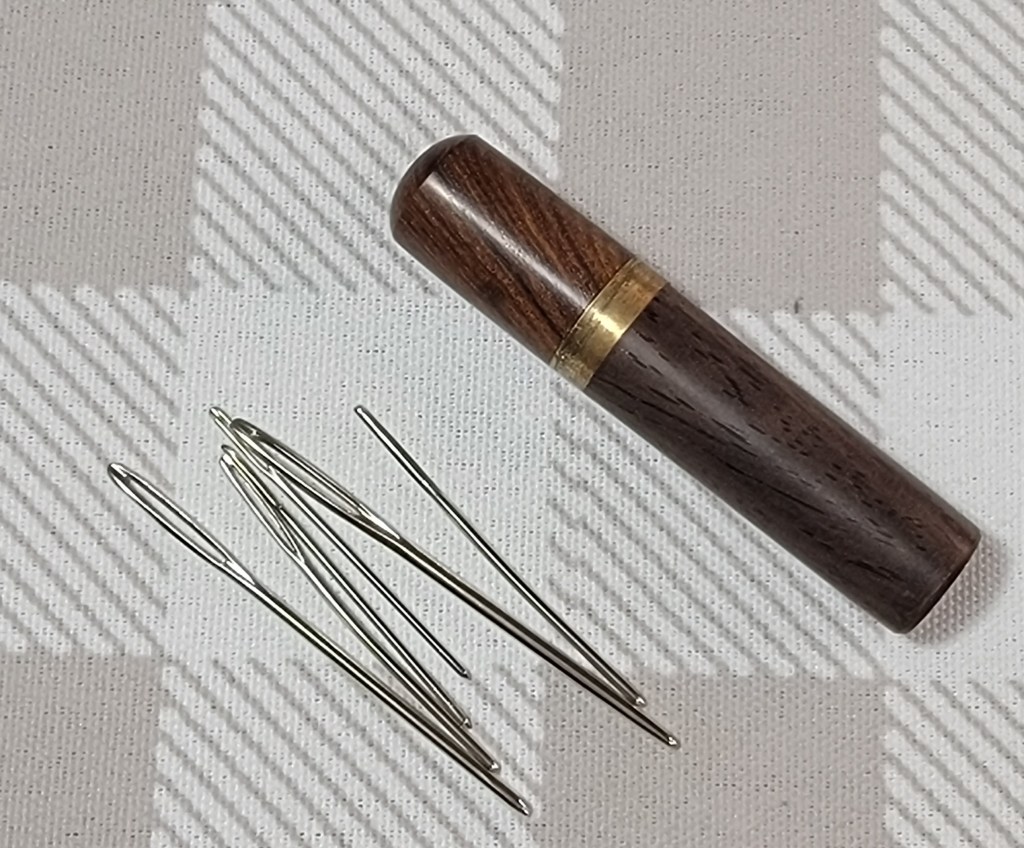
- Yarn Needle
- Fiberfill (I use Morning Glory brand)
- 9mm-12mm Safety Eyes (Choose the size
- eyes that fits your project)
- Stitch markers
- Black Embroidery Floss
- Yarn Guide / Finger guard
Notes:
- I use US terminology in my patterns.
- I will teach you two ways to add eyes. You can use safety eyes, felt or craft foam. If you want to add craft foam or felt eyes buy a sheet of those in black.
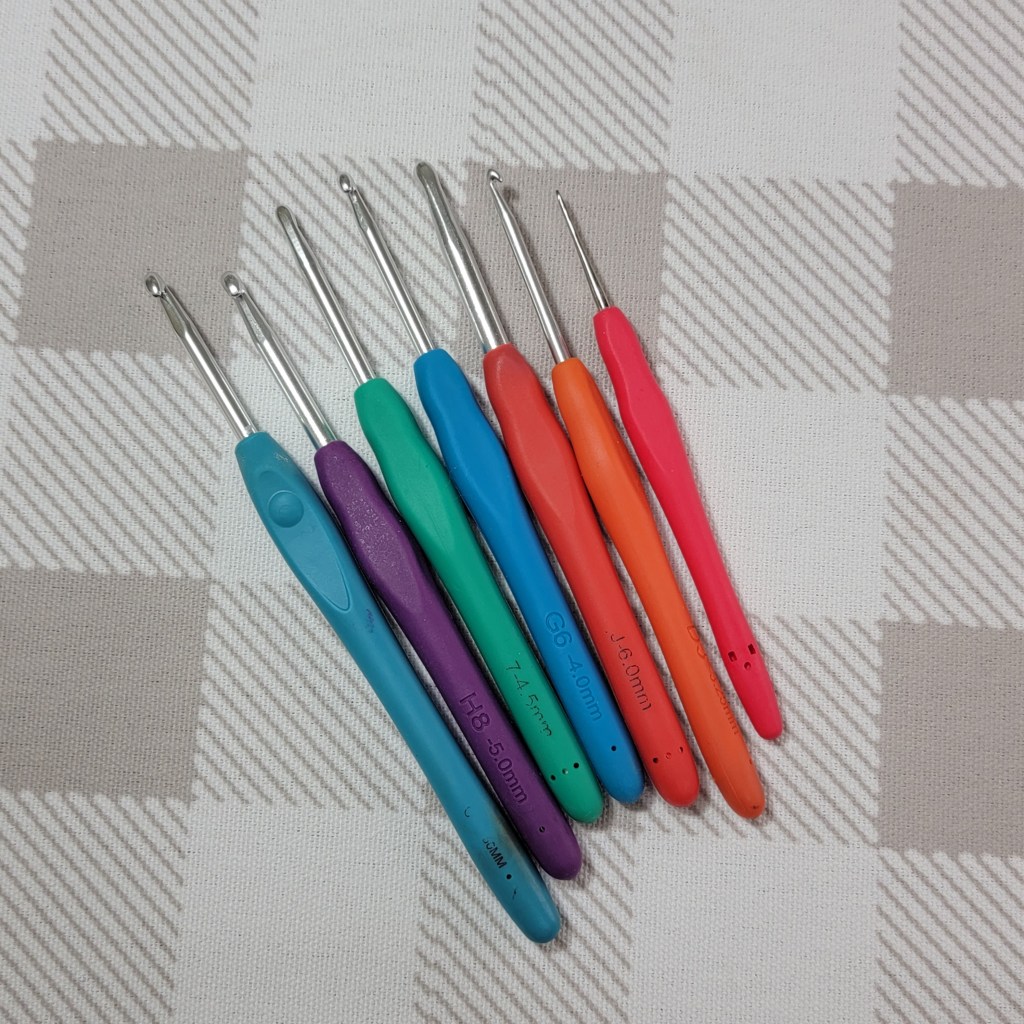
- Again, your yarn choice and your gauge dictate the size of your hook. I use a 4.0mm hook for worsted weight yarn. This helps me get a tight stitch. Tight stitches are important in amigurumi so that your stuffing doesn’t show through the stitches.
Types of Yarn
If you’ve been to the craft store or craft section at any major retailer, you are probably asking yourself: what yarn should I choose?

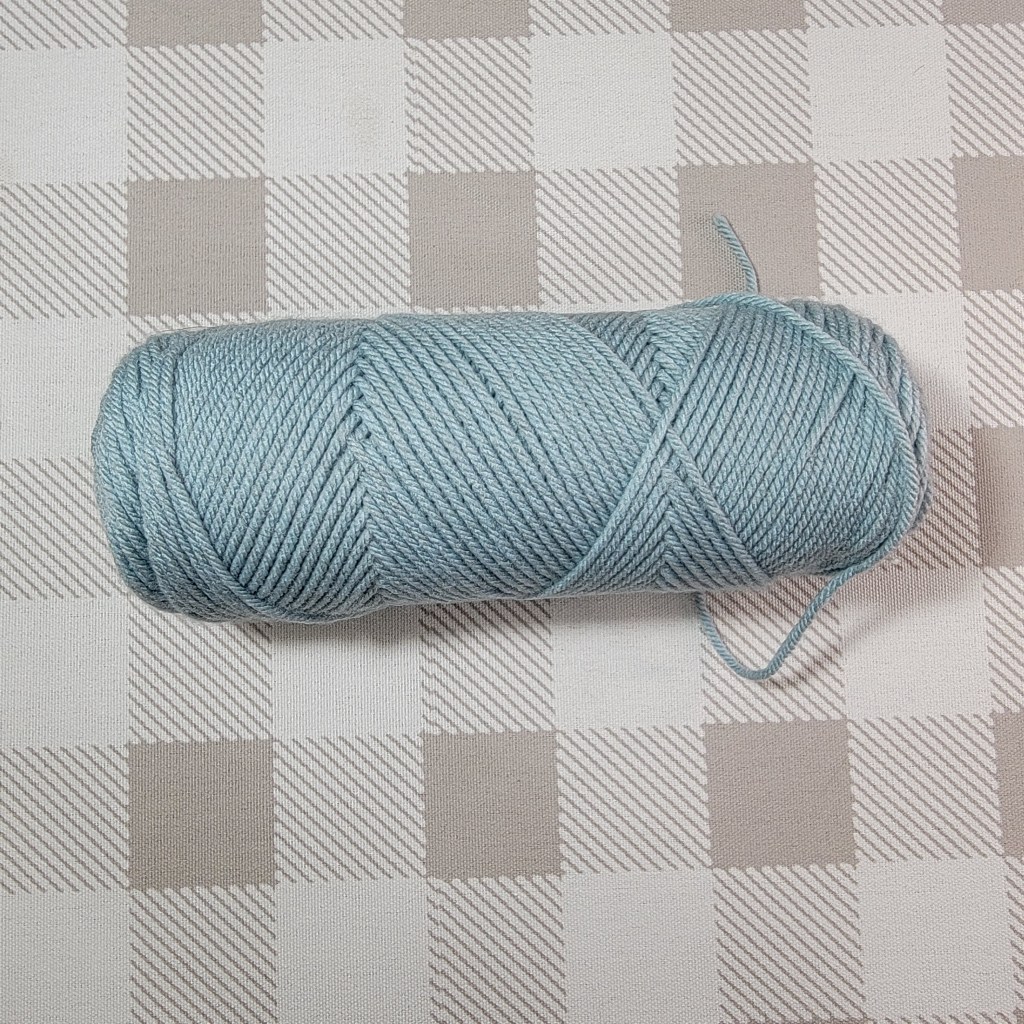
For this project, especially if you are a beginner, I recommend going with a standard worsted weight yarn. Acrylic is fine for this project, or you can choose a cotton. Cotton is mostly used in amigurumi because it doesn’t stretch as much. However, for this project, the cheap and standard acrylic worsted weight is fine.
Now I am sure you beginners are asking, well how do I know what kind of yarn it is? The label is going to tell you everything you need to know.
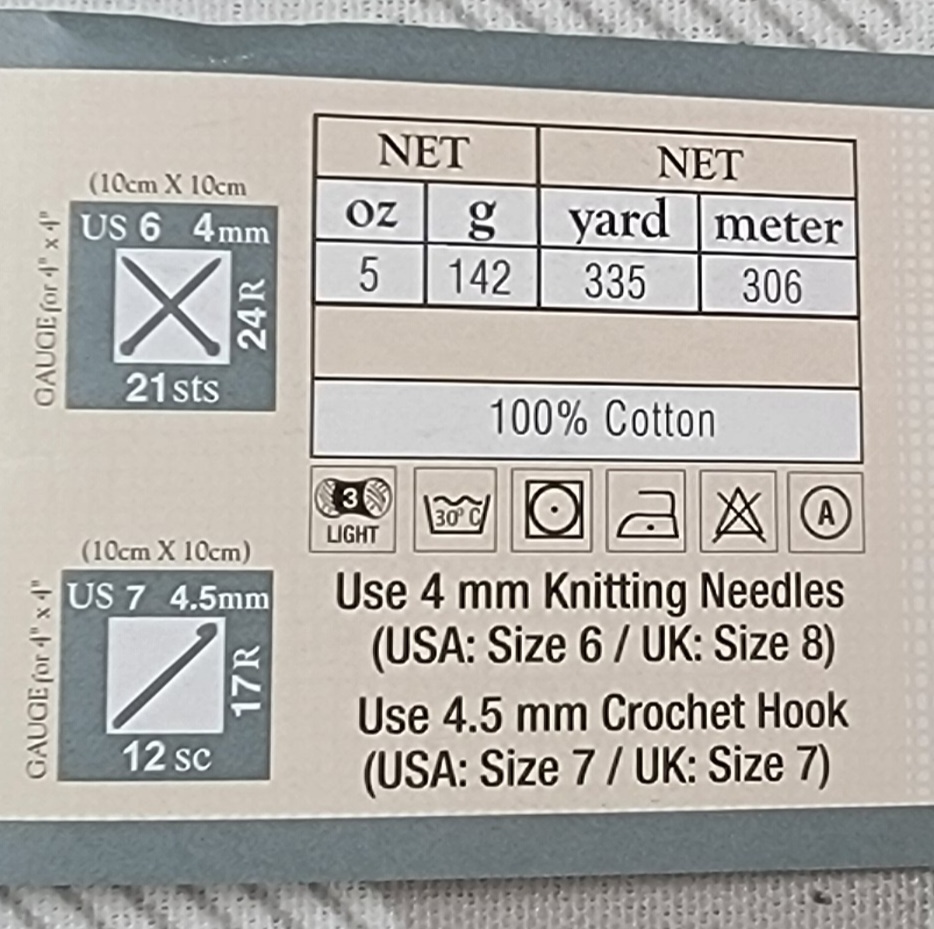
How to read a yarn label

When you roll a skein (that is the bundle or ball of yarn) over, this is what the label looks like. It has on it all kinds of information.
Take a minute and really look at it and see if you can understand it.
Along with care instructions, it has what material the yarn is made of, what knitting needles and crochet hook are suggested, and how much yarn is in the skein.
Let’s take a closer look.
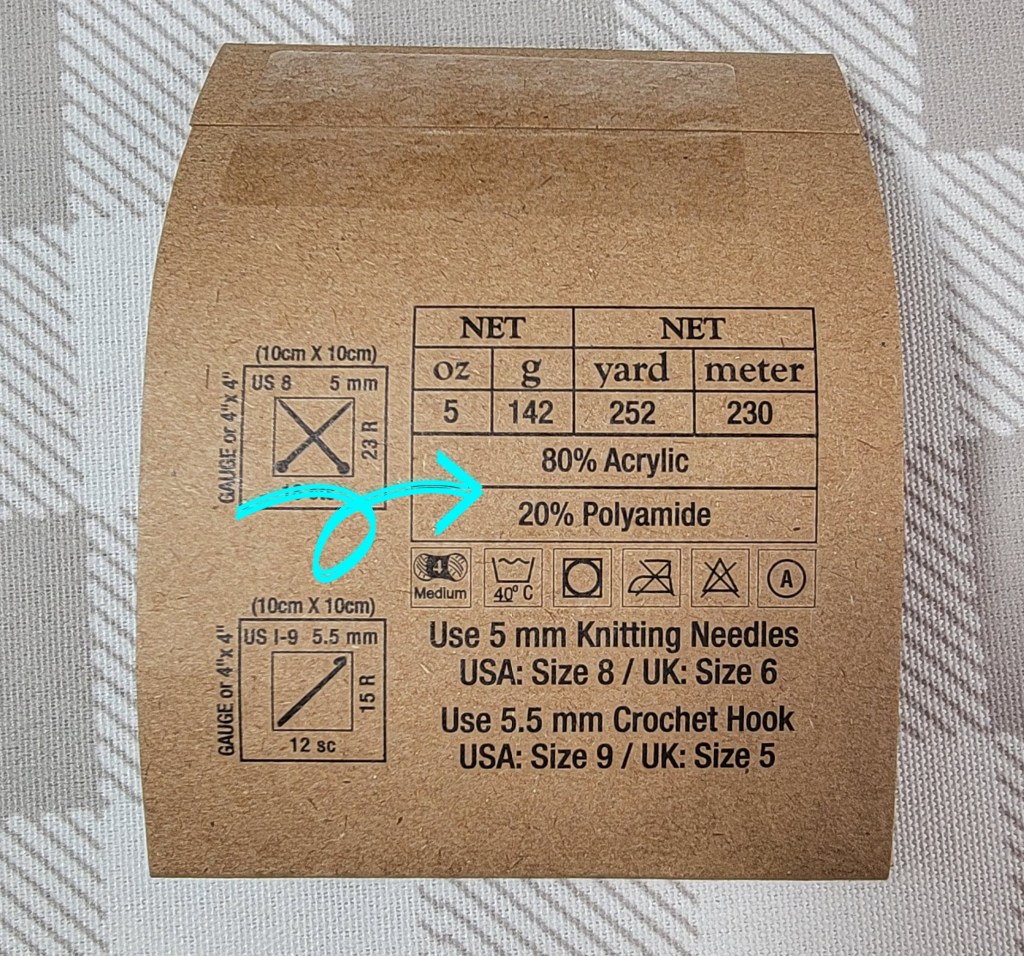
So, how do I know this is worsted weight? The 4 on the yarn graphic lets me know that this is a worsted weight.
1 is fingering or sock weight
2 is sport or baby weight
3 DK or light worsted weight
4 is worsted or aran weight
5 is chunky (sometimes called bulky)
6 is Super chunky
7 is roving

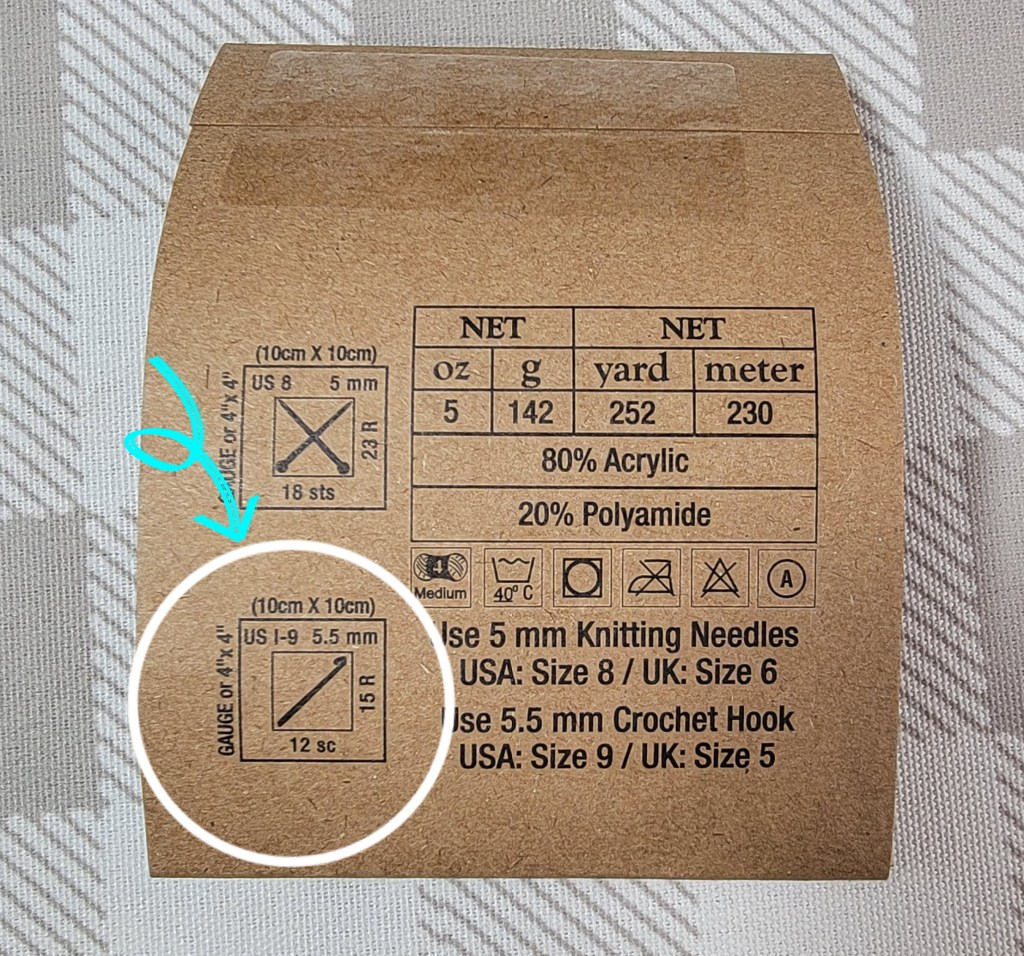
Gauge is how many stitches and rows there are per inch. Gauge is how we as crocheters know the size of a finished project. This is especially important in garments. Items like dolls it is less important. But if you want to achieve the same size as what you see in the pattern, the gauge helps you determine what hook you need. Each crocheter has a different tension on their yarn, so each person will crochet tighter or looser than another. In many patterns, the author will include instructions of a gauge swatch, which is usually 4″x4″. You would crochet this in your chosen yarn and hook to see if your size matches the original artist’s. If not, you could use a different size hook to calibrate to the correct size.
I am telling you this, so you know what is meant by these terms. Since you are beginners, these are not really that important for this project. It is more important that you learn the stitches. Knowing if you crochet tightly or loosely will come later.
Amigurumi is a type of crochet that works better when you crochet tighter stitches. I usually go down a size or two in the recommended yarn hook to make sure my stitches are tight enough.
As you can see from the picture, the recommended size is I-9 or 5.5mm. I usually use a 4.0mm hook on worsted weight yarn when I am doing an amigurumi piece. That is what I will use when I am showing you how to crochet this pattern. That brings us to our next section and question…how do you choose a hook?
Choosing a Hook
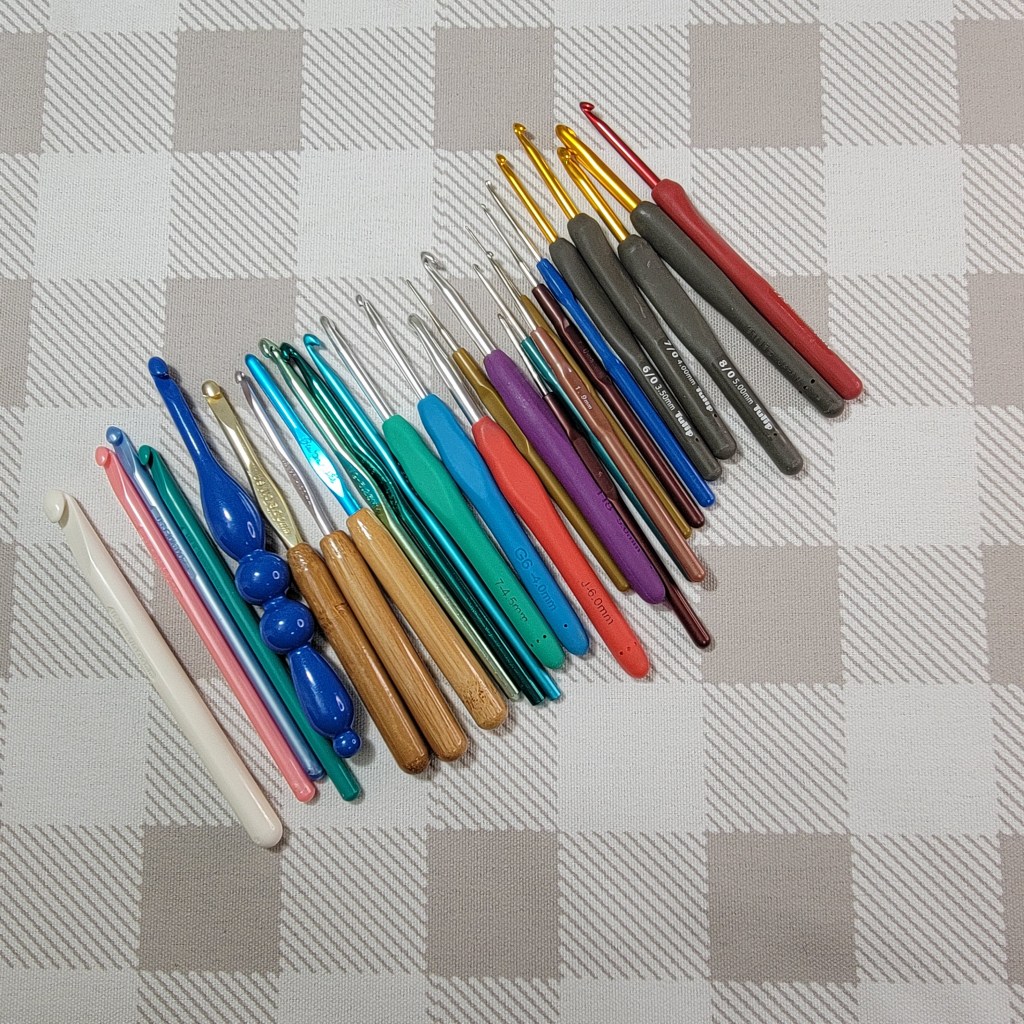
As you can see from the picture, there are many, many, many types of hooks out there. They are in all different kinds of price ranges. These days, I use the Tulip Etimo hooks. These hooks are expensive and like the Cadillac of the crochet hook world. Beginners, you DO NOT NEED these hooks. In fact, I say buy way cheaper hooks to begin with.
Why? First, you don’t know if you will want to continue to crochet. So, don’t waste big bucks on a hobby you didn’t stick with. Second, they aren’t necessary. I only bought these hooks in the past year. They do crochet smooth like Butter, but I had great success with other hooks.
Here are some things to be aware of when buying hooks:
- Pick the comfort grip or ergonomic grip…your hands will thank you
- If you have metal allergies, like I do, do not get the all metal…really cheap hooks
- Look at the hooks and make sure that it has a deep enough hook to really grab the yarn
- Plastic hooks bend while you crochet
- If they don’t feel comfortable in the grip you choose, return them.
- Remember that all my recommendations are my opinion…go with what you feel good buying.
I would say most of you should just buy one of the comfort grip sets that are cheap on Amazon. I have these. They work pretty good. They are cheap. And you get several hooks in different sizes.
Stitch Markers and Other Items

Since we are doing an amigurumi project, you WILL need stitch markers. Do not think you can rely on your counting and remembering. These are super cheap, and some of the Amazon crochet hook kits come with them. Also know…you WILL lose them or they WILL break, so you can never have too many.
The next item that I recommend is a yarn guide or finger protector of some sort. I use these that are also cheap on Amazon.

If you don’t use one of these, you will wear a groove in your left pointer finger…or right one if you are left-handed. You can also wear a bandaid on your pointer if you don’t want to purchase this item.
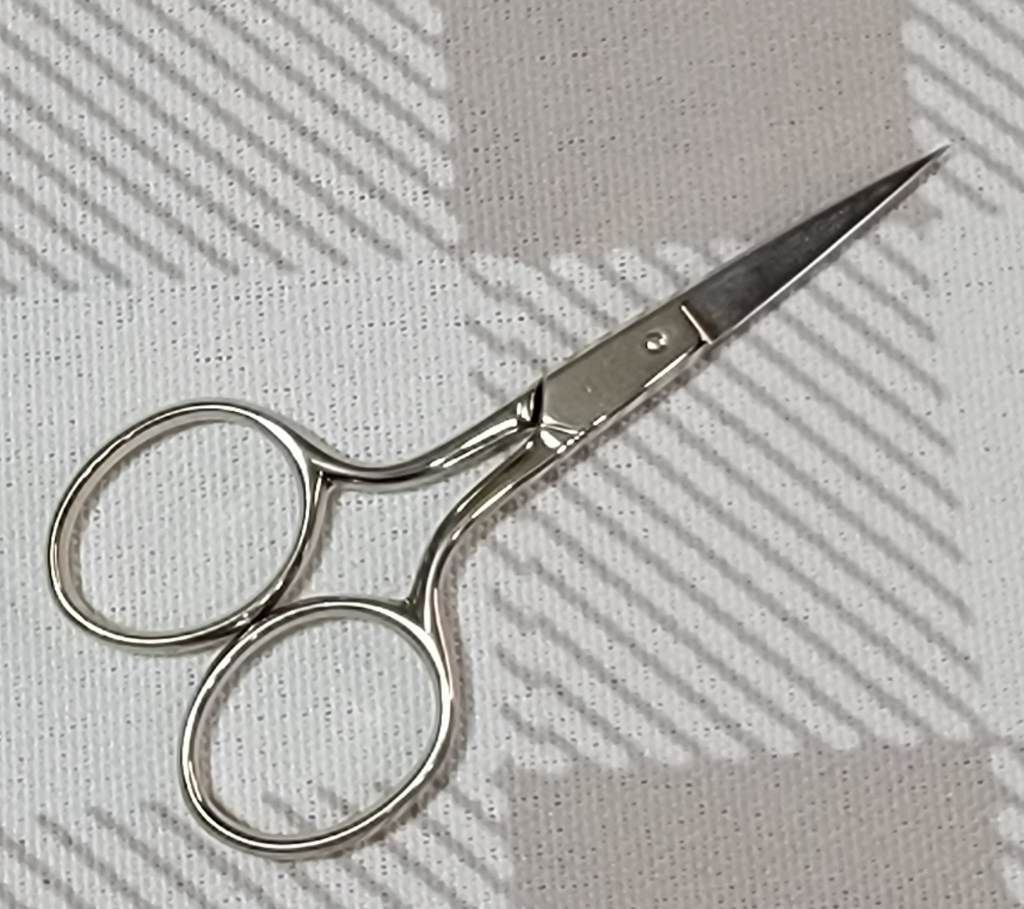
Then you just need scissors, yarn needles, and embroidery floss.
Homework for Beginners
First, see if you can read the label below. What size crochet hook does it recommend? What is the yarn made of? What weight is the yarn?
Types of Grips
Practice holding your hook this week. I want you to get a feel for it. Hold it in your hand. Try both types of main grips and see what feels the most comfortable.
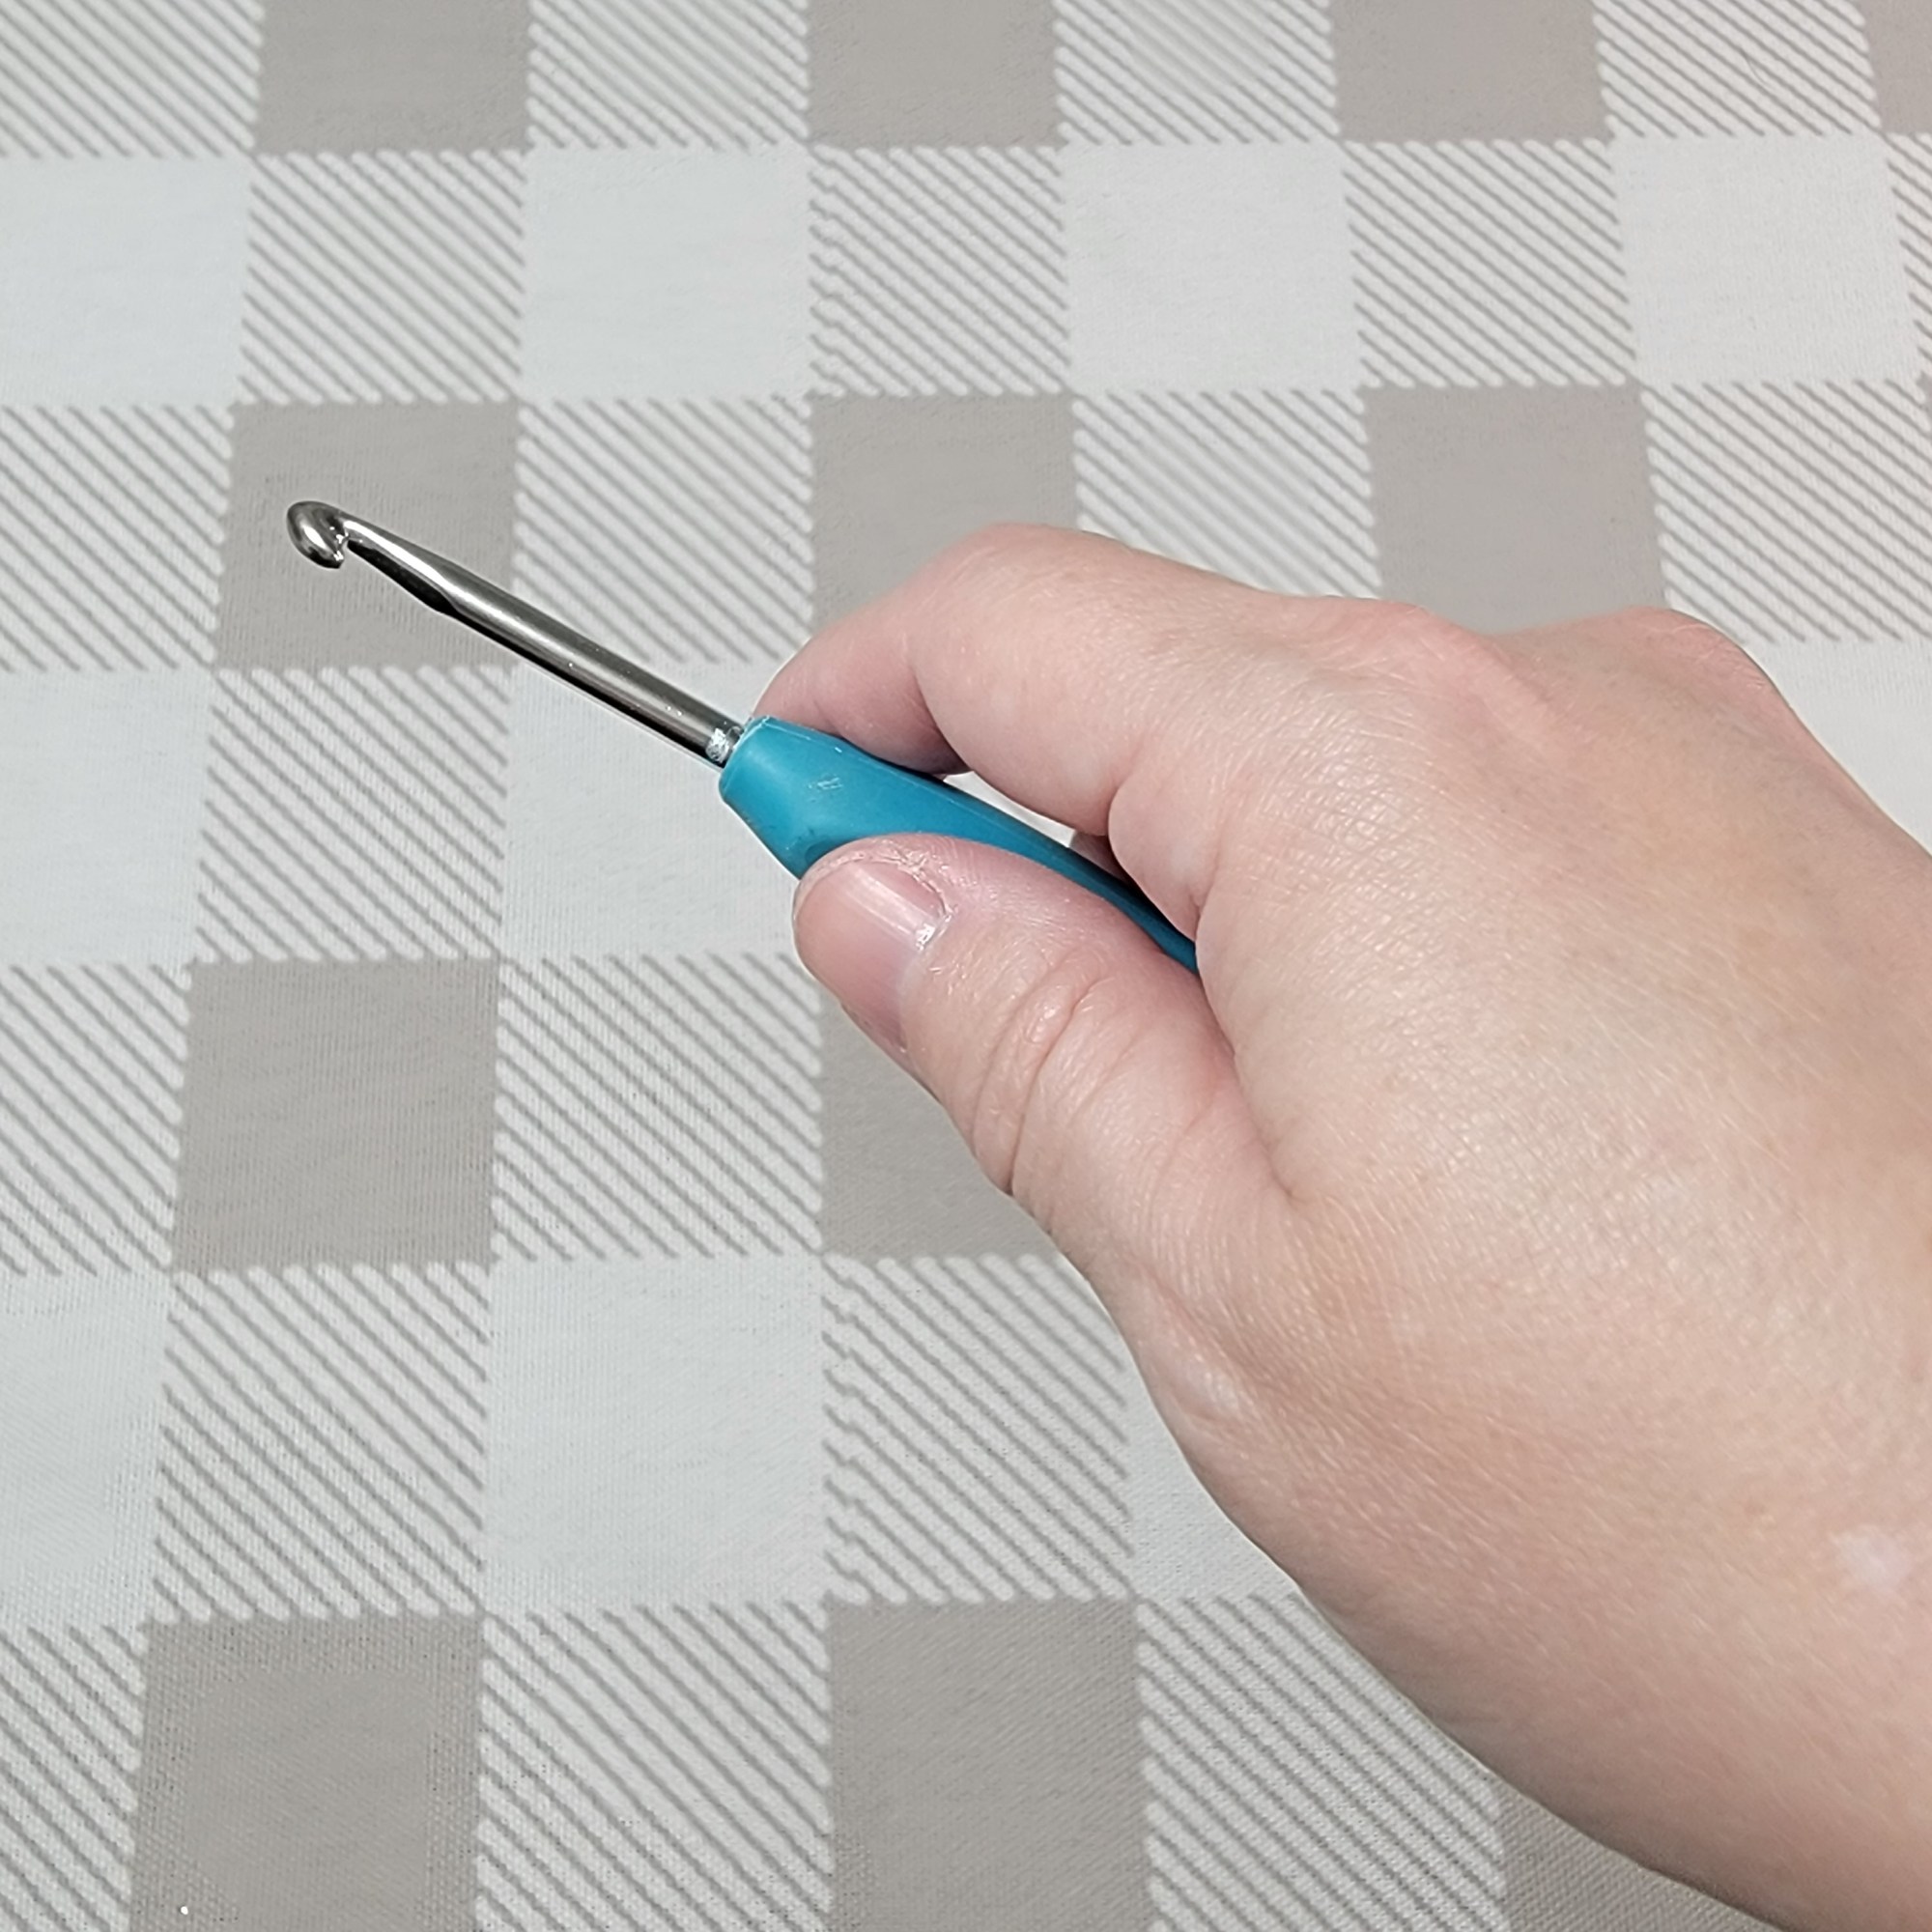
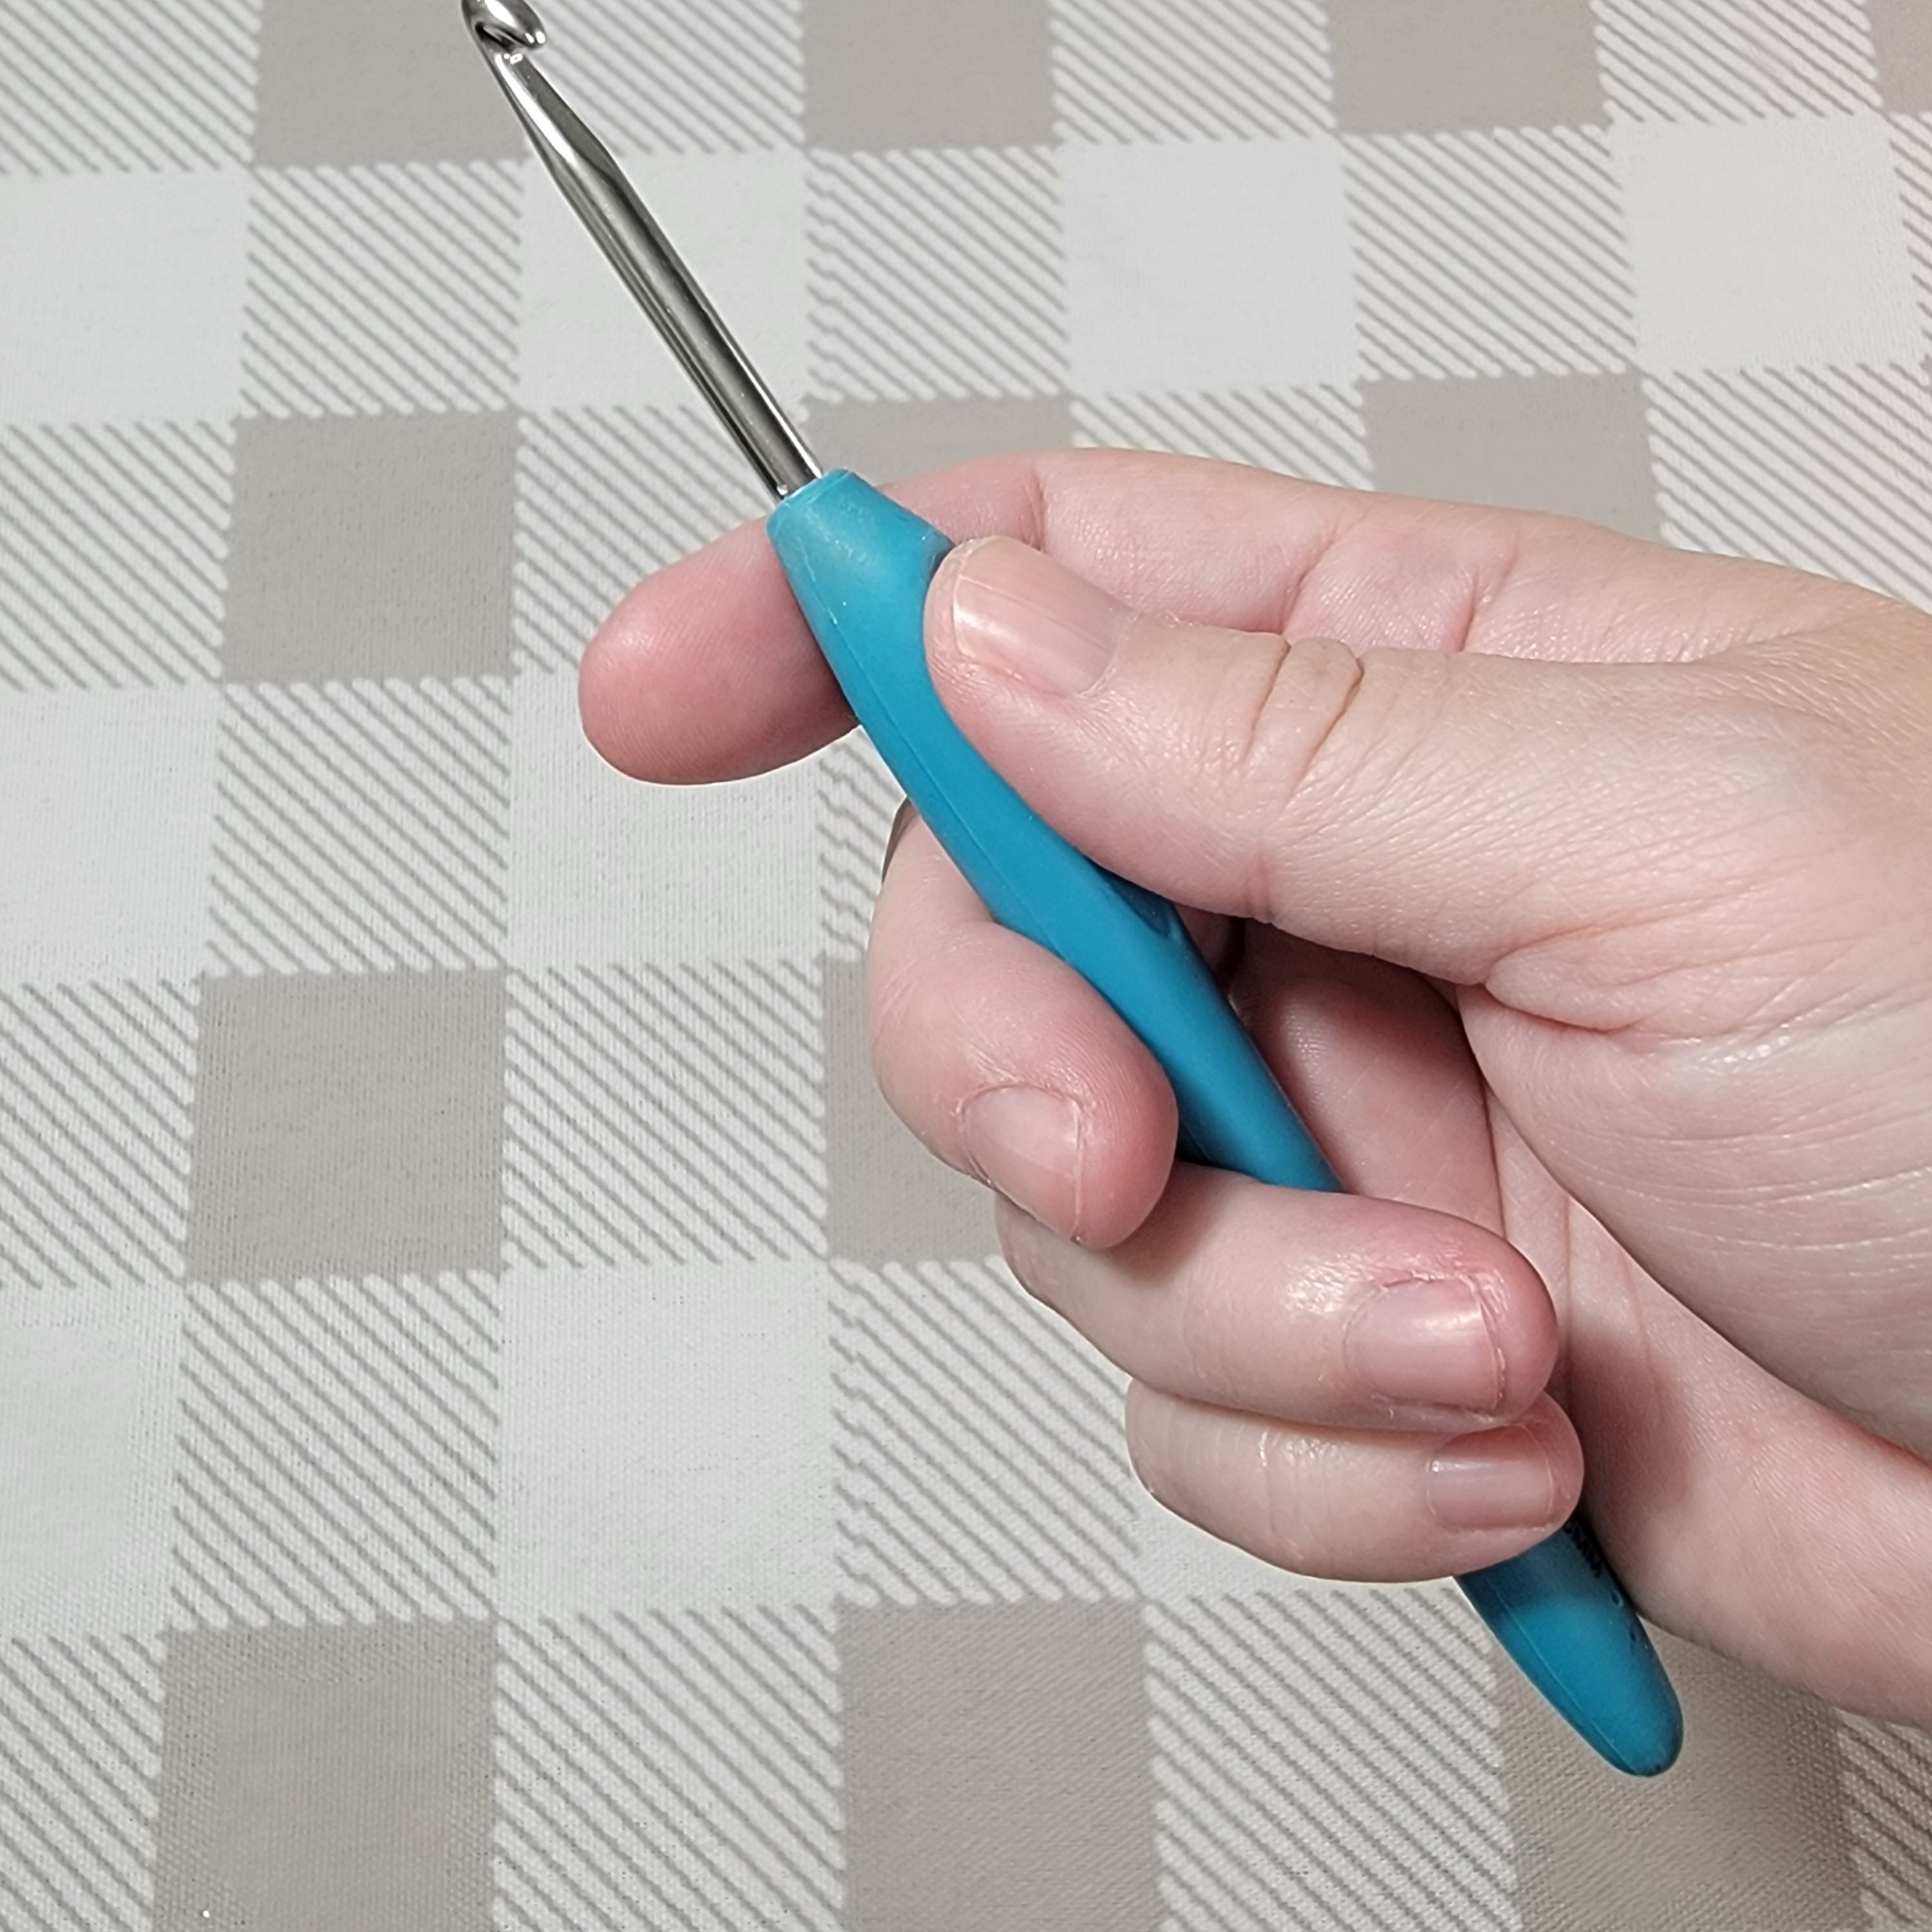
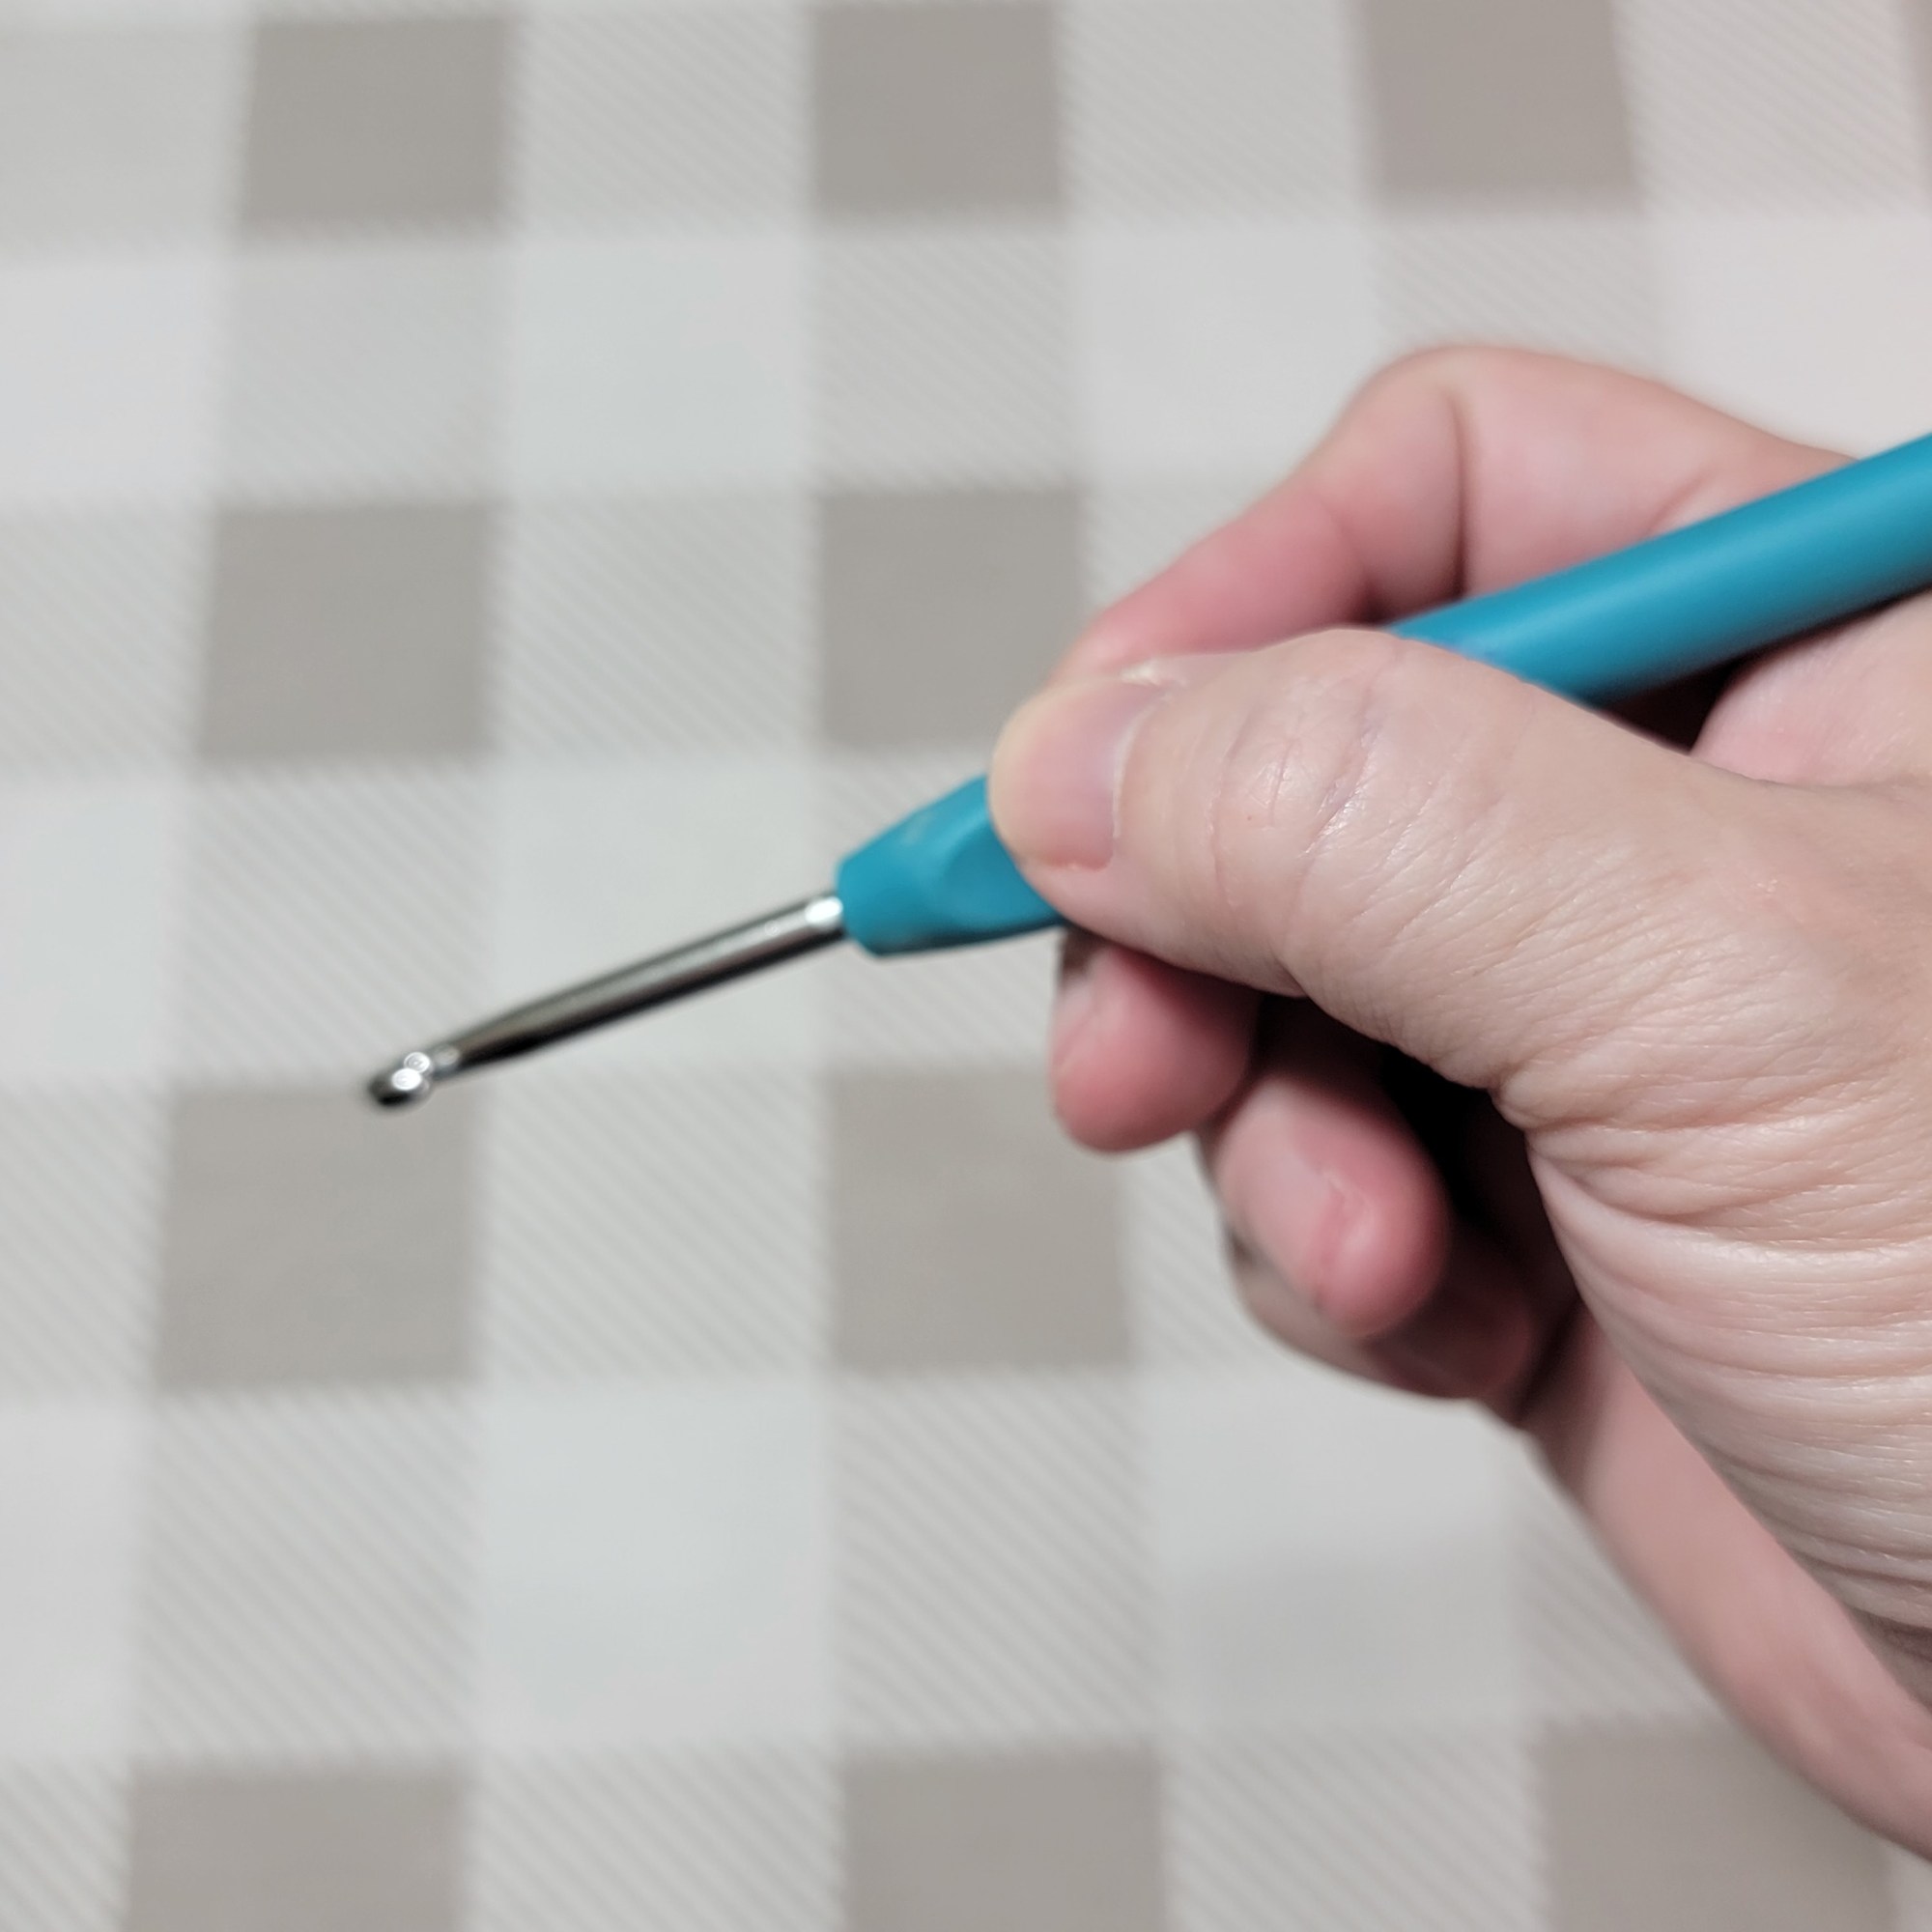
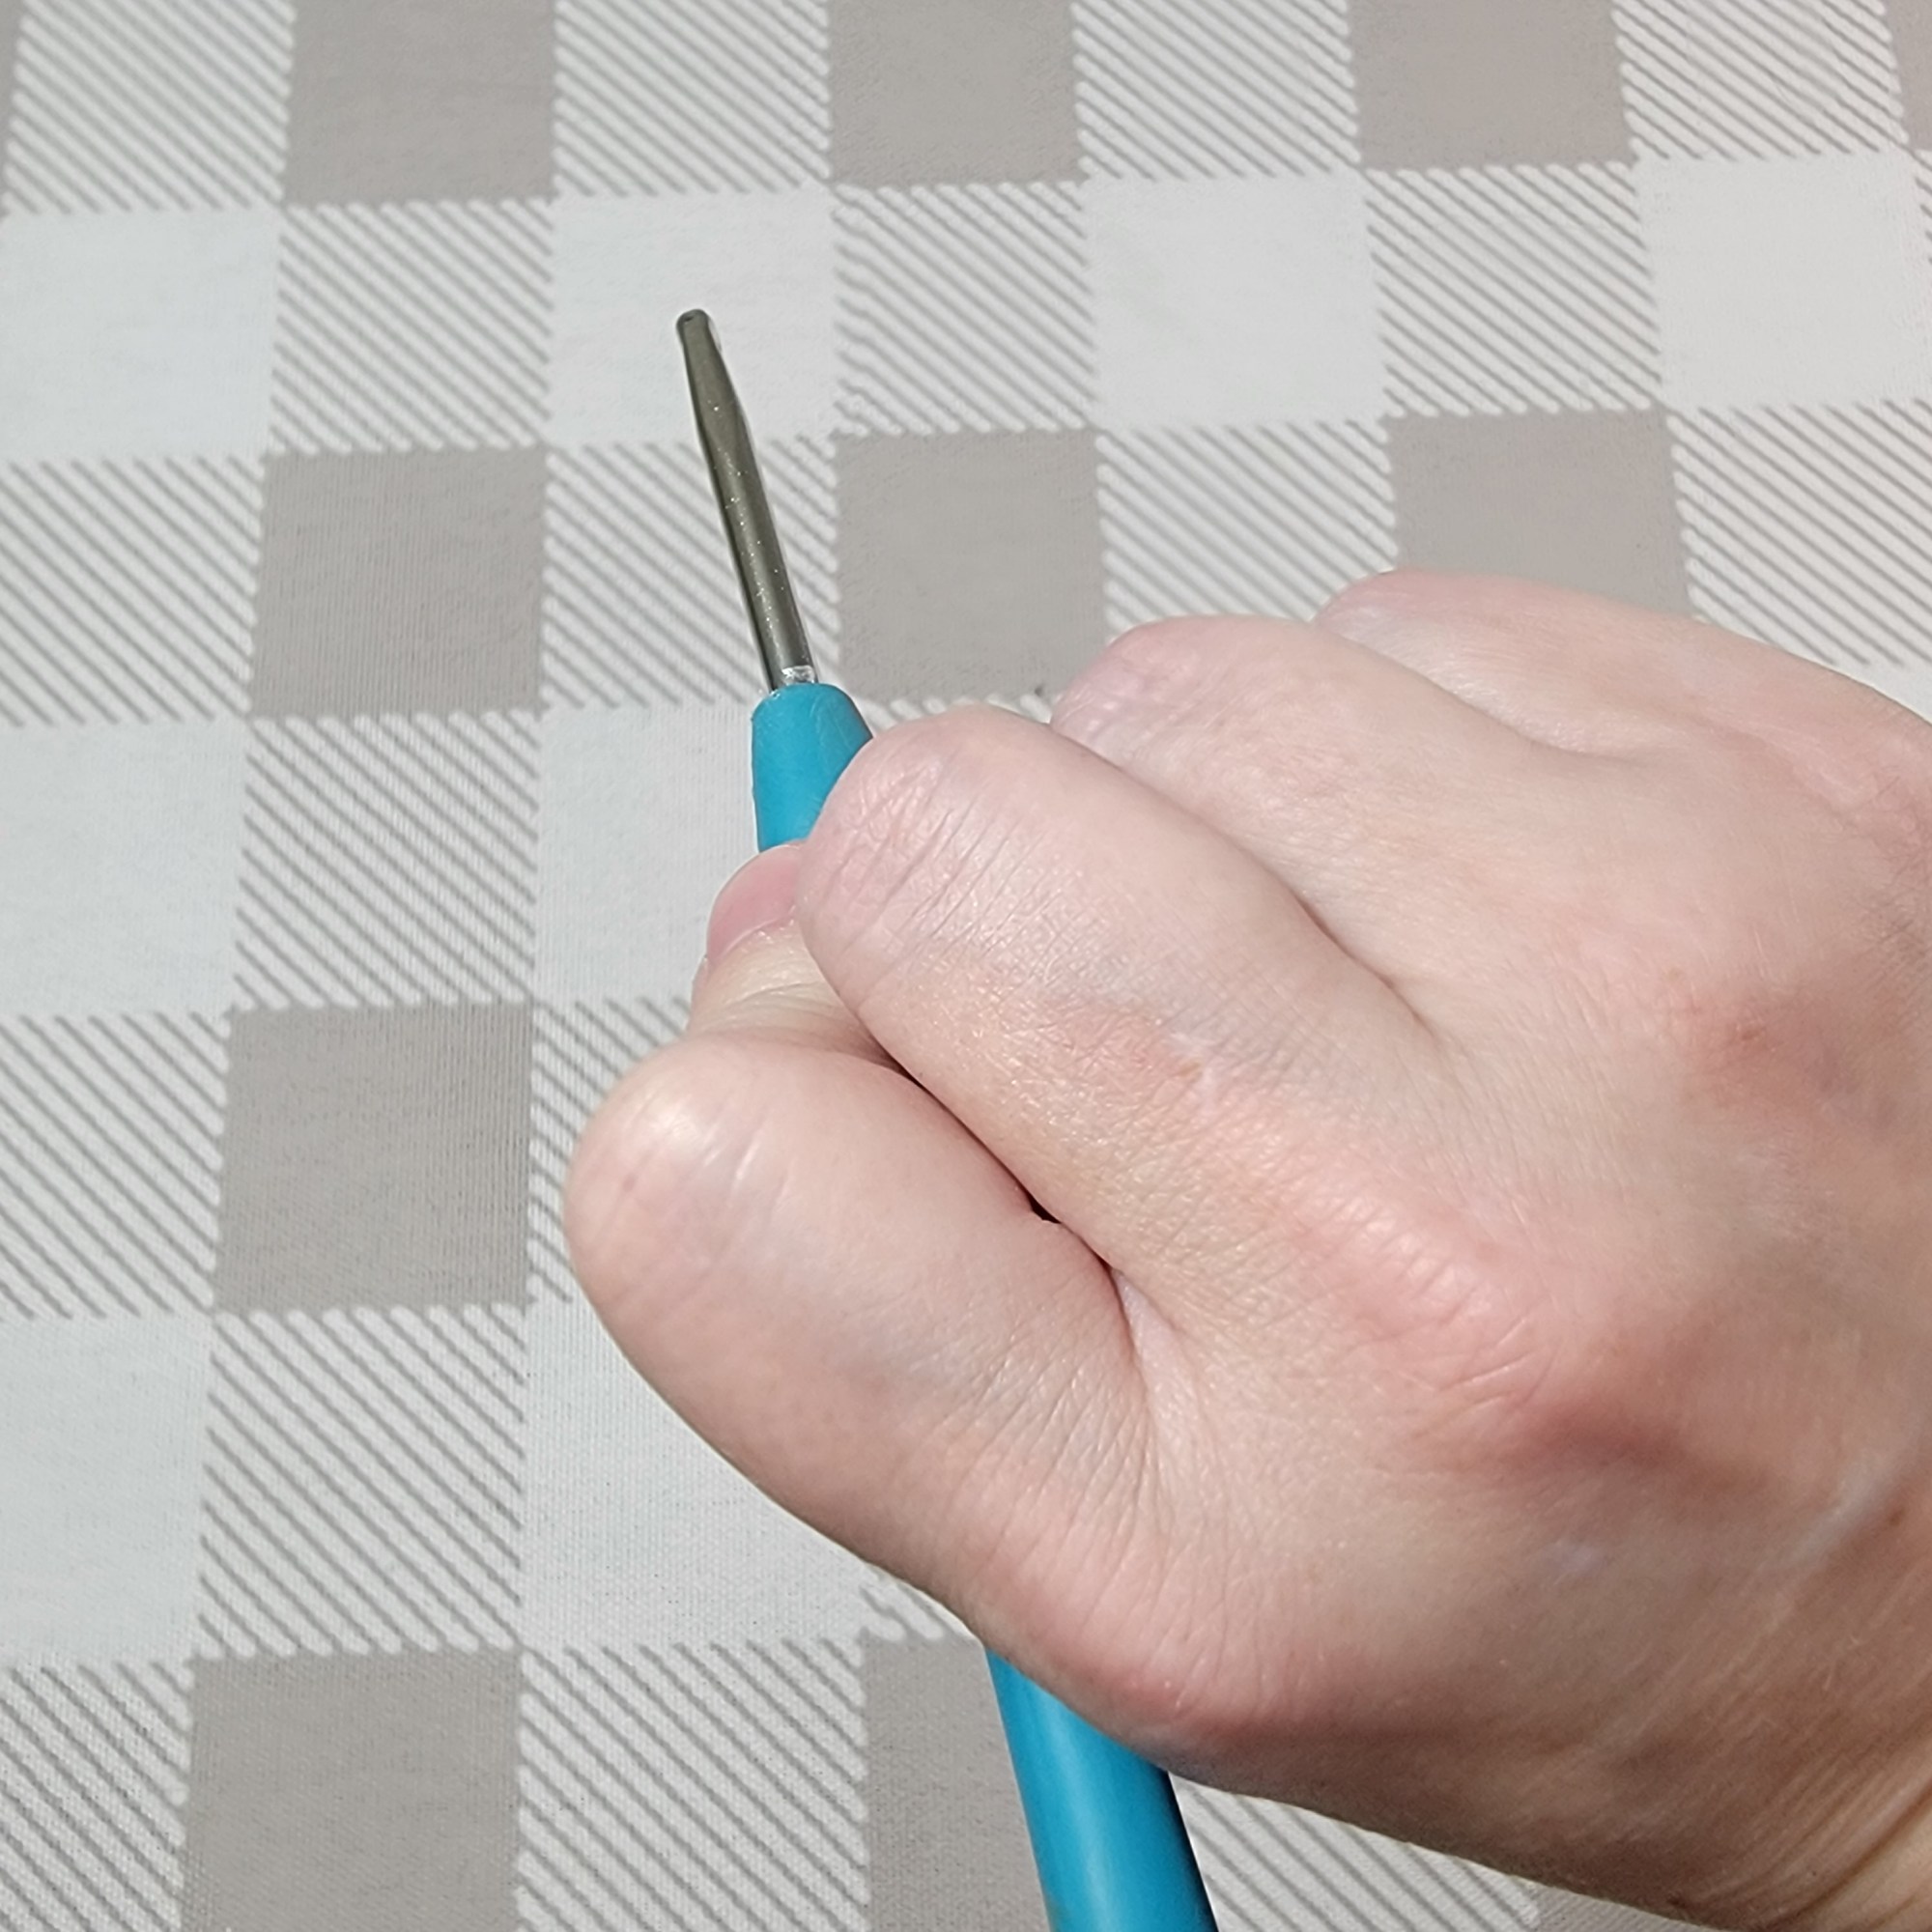
The first two images are knife hold and the second two are pen hold. I use the knife grip, and I am right-handed. Note that if you are left-handed, you will have to flip everything I teach you. Either of these holds work fine. Choose which one feels comfortable to you.
You have just one more task. I want you to practice making a slip knot.
Okay, that’s it for this week…if you have questions, find me on Twitter or Instagram!
Instagram Lives and More Information
Next Wednesday, August 3rd, we will have our first Instagram Live to talk about concepts from the past week and the upcoming week. Use this time to ask questions. I am open to any and all questions. I may not have an answer, but I will do my best. Don’t stress if you will miss the live! I will save it to my Instagram and post the link to the blog. You can also go back and use the video as much as you want.
Next week, we will also begin actually crocheting! Beginners as we go I will teach you to read a pattern, basic stitches, and other information. There will be videos

One thought on “Learn to Crochet an Amigurumi Whale”