Welcome to lesson 2! Beginners, I hope you did your homework for lesson 1! You should now be able to hold your crochet hook and make a slip knot.
I will now divide each week into two parts. The beginners’ section will have detailed how to crochet lessons each week. If you are advanced, you can skip this part and go straight to the pattern for the week.
Beginners | Advanced (Go Straight to this week’s pattern)
Beginners
To get us started this week, we need to learn how to read a pattern. All patterns will start with a materials section. We went over what you need last week, so see lesson 1. The second part of a pattern will give you an abbreviations list and stitches used in the pattern. Always look this over to make sure you understand what will be required in the pattern you want to undertake. You need to make sure you know the stitches that will be used and find tutorials if you don’t know them.
Here is our stitch abbreviations list:
ch= Chain
sl st= slip stitch
sc= single crochet
hdc= half double crochet
dc= double crochet
tr= treble or triple crochet
inc= increase
• (two sc stitches in one stitch)
inv dec= invisible decrease
• (insert hook in front loop of sc, pull up a
loop, insert hook in front loop of next sc,
pull up a loop, yarn over and pull through
all three loops on hook)
picot= (ch 3, insert hook in third ch from hook, sl
st)
Rnd= round
• This item is worked in the round for the
body. (Mark the beginning stitch for each
round to keep track of where you are in
your work.)
BLO= back loop only
Magic Ring: This is a great way to make an
invisible and tight round.
Not all of these stitches will be used in our pattern, but I wanted you to see how they are abbreviated. The stitches you will need I will teach you when you need them.
Make sure you notice if a pattern says it is US or UK stitch terminology. In the US a single crochet is a double crochet in UK. The UK stitches are always a step up from the US stitches. I have no idea why…they just are.
This week we are going to begin by crocheting the bow for the whale. I will now show you what the pattern looks like. Then, we will talk about it.
Ch 16
Row 1: Sc in each chain across (15), ch 1, turn
Rows 2-10: Sc in each stitch across, ch 1, turn
At the end of row 10, do not chain 1 or turn.
Finish off, leaving long tail for sewing. Weave in chain tail.
Pick a side to be the wrong side of the bow
Now, let’s discuss what these lines mean.
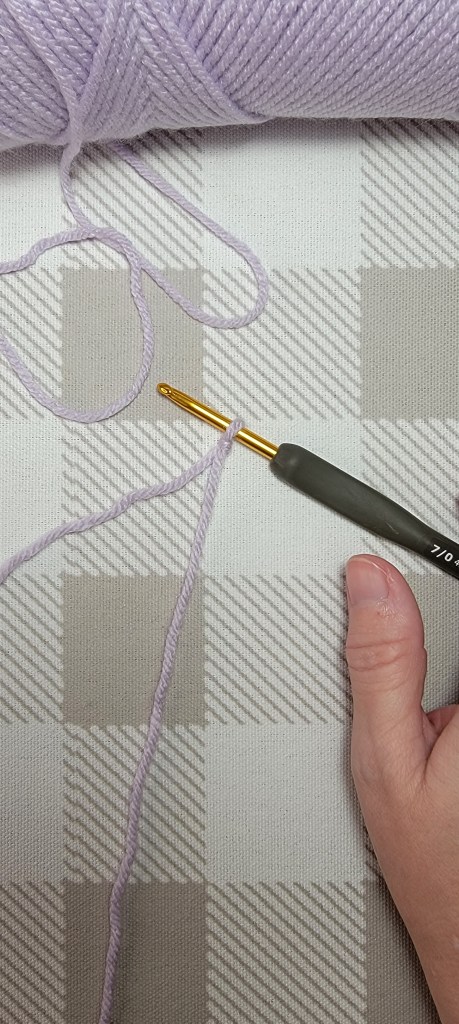
Ch 16 means to chain 16 stitches. If you look at your abbreviations list ch = chain stitch. To make a chain stitch, you begin by creating a slip knot and putting it on your hook. Remember this from last week? Here’s the video for a reminder:
Once you have the slip knot on your hook, you will need to chain stitch. To learn to chain stitch, refer to this video:
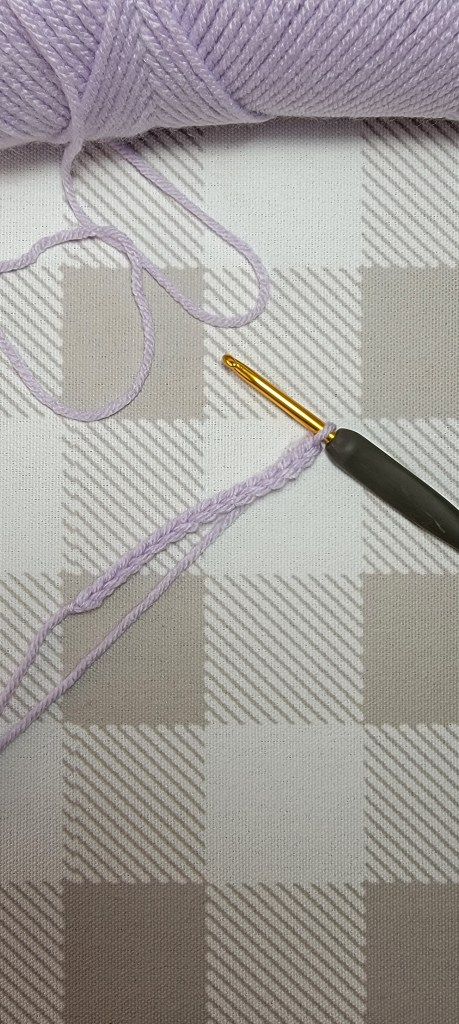
Count to 16 as you create the chains. The slip knot does NOT count as your first stitch. Your chain should look like this:
Row 1: Sc in each chain across (15), ch 1, turn
This is the second line of our pattern. You will flip your chain over. Skip the first stitch and begin working the regular single crochet stitch. The following videos will show you how to work the chain and crochet the single crochet stitch.
IT IS OKAY IF YOU ARE SLOW! It takes time to learn. If you make a mistake, simply remove your hook and pull. The stitches come out easily and you can pick up again….or start from the beginning.
Watch these videos as many times as you need. It may take a couple of days of practice to learn. Pay careful attention to how I hold the yarn in my left hand. You do not want to hold the yarn too tightly or too loosely. It needs tension but it should not be pulled so tight that it is hard to pull the hook in and out. You may have to play with how you hold the yarn. There is no correct way. You have to find what works for you.
At the end of your row, after you have 15 single crochet stitches, you will need to ch one. This is just like the ch st you worked to make the base chain. You have 15 stitches because we skipped the first chain. Once you chain 1, flip your project over.
Crochet in rows is worked back and forth. One side and then the other.
Our next line of pattern is:
Rows 2-10: Sc in each stitch across, ch 1, turn
Do not ch 1 or turn after finishing row 10.
This means for the next rows, each one of them will be the same. You will single crochet in the first stitch and each one across. Tune in for Wednesday’s live or look for the post on the Live 1 to see how to find the stitch to crochet into. You can also watch the above single crochet video to see where I place my hook.
In rows 2, 3, 4, 5, 6, 7, 8, 9, and 10, you will single crochet in each previous stitch across so that you have another row of 15 single crochet stitches.
Finish off, leaving long tail for sewing.
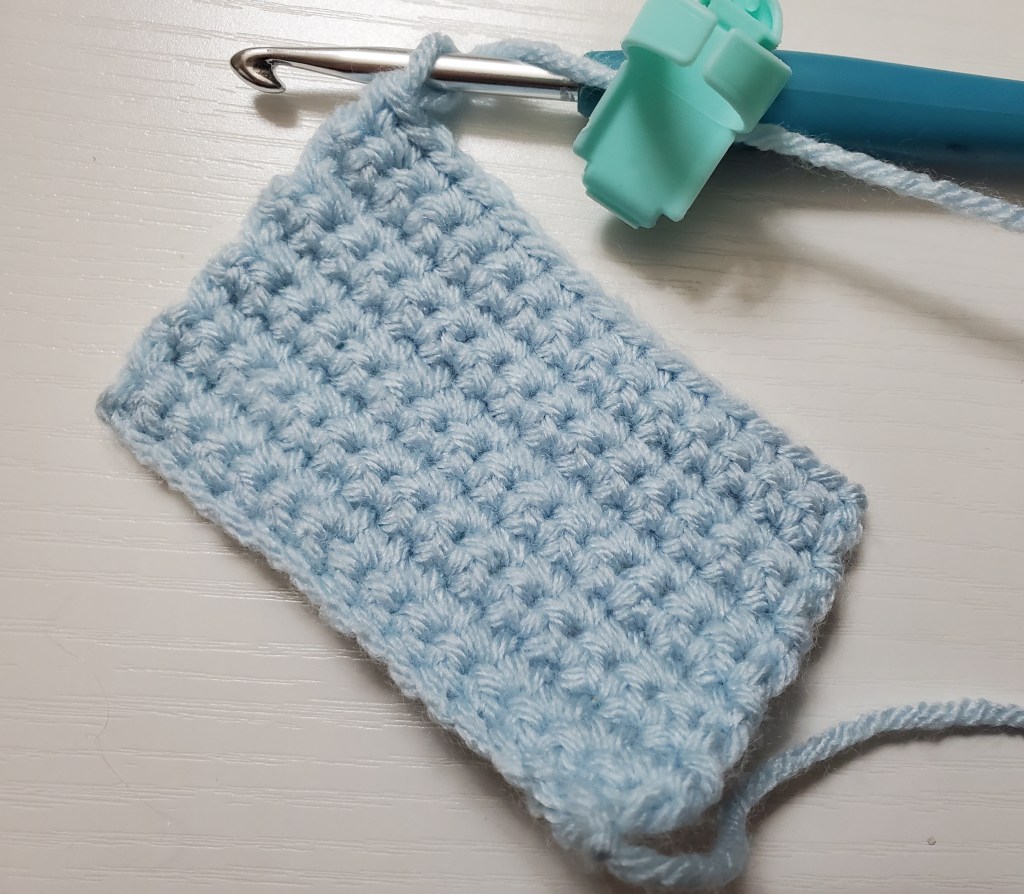
You will finish off the last stitch by cutting the yarn from your ball. Since the pattern says leave a long tail for sewing, leave about 6 inches from the ball of yarn. You will pull the tail through the loop that is left from the last stitch. This will create a knot to hold it in place. You should have a rectangle that looks like the picture below just before you finish off. Finish off means to make that final knot that I just described so your work does not come undone. The rest of the pattern instructions will make more sense next week when we finish up the bow.
Homework
For this week’s homework, practice making a chain and working the chain with single crochet over and over. You will want to do this practice before actually making your bow. To conserve yarn, don’t cut it off. Simply, remove your hook and pull to unravel the work you’ve done. I would say work the chain at least 10 times. This will help you figure out how best to hold the yarn and commit the stitches to memory.
Take a picture of your work and share if you want to. You can use #learnwithmellmakes. And tag @mellmakes and @army_mellissa on Twitter…again, if you want.
Celebrate at the end…even if you fail. You are trying and that is what matters! It will take practice and dedication. Crochet is not easy at first.
Advanced
US Terminology
Abbreviations:
ch= Chain
sl st= slip stitch
sc= single crochet
hdc= half double crochet
dc= double crochet
tr= treble or triple crochet
inc= increase
• (two sc stitches in one stitch)
inv dec= invisible decrease
• (insert hook in front loop of sc, pull up a
loop, insert hook in front loop of next sc,
pull up a loop, yarn over and pull through
all three loops on hook)
picot= (ch 3, insert hook in third ch from hook, sl
st)
Rnd= round
• This item is worked in the round for the
body. (Mark the beginning stitch for each
round to keep track of where you are in
your work.)
BLO= back loop only
Magic Ring: This is a great way to make an
invisible and tight round.
Instructions for Bow:
Ch 16
Row 1: Sc in each chain across (15), ch 1, turn
Rows 2-10: Sc in each stitch across, ch 1, turn
At the end of row 10, do not ch 1 or turn.
Finish off, leaving long tail for sewing. Weave in chain tail.
Pick a side to be the wrong side of the bow.
