I decided to combine the last two steps into one post; compared to our other steps, they are each relatively short. At the end of this week, you will have a complete version of the Jack in the Box doll! I can’t believe we are here already! I’ve had so much fun creating this pattern and having you all follow along! Step 6 is making the hat; Step 7 is putting on the face! Here we go…
Step 6 | Step 7 | End of Project
Materials
For Step 6:
Fleece or Felt to Make the Hat
Sewing Thread
Sewing Needle
Straight Pins
Fiberfill
Pom Poms (small)
hot glue
Step 7:
This will depend on how you want to put the face on. You will need paper to print the template. But then it depends on how you want to put on the face. If you want to embroider, you will need yarn or thread and needle. If you want to recreate what I did, you will need: glow in the dark HTV for the Jack Version and Black, neon green glitter, and neon orange glitter htv. I use Siser brand htv. If you want to paint the face on, you will need paint or paint pen. If you want to use felt or foam to cut out the face, you will need those materials and glue.
This step is where your creativity can shine. Instead of being afraid, use it as a chance to make the doll your own and have fun. You can even come up with your own face and truly make it your own doll.
Step 6
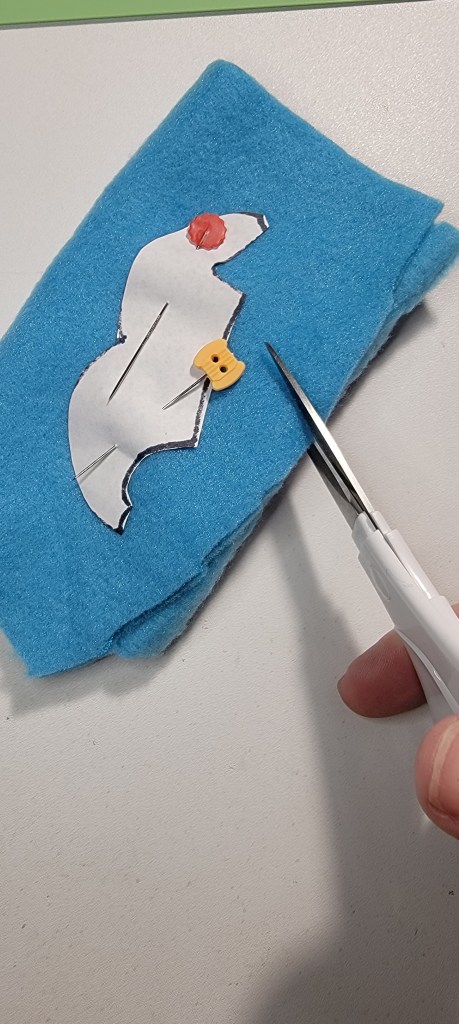
To make the hat, first you will have to cut out the pattern. The way I created this hat pattern is that I printed a photo of the original Jack in the concept art and simply cut out the hat. Then, I traced around the cut out hat to add a small seam allowance. You will just need to print out the hat pattern that I have made you below. You can right click on the image and save it to your computer or phone and then print. To make sure you have it sized the right size, I have included images with a ruler. It is up to you to figure out how to size your image for printing, but you can always put it in a Word document and simply drag the image until it is the correct or near correct dimensions. So, in short, print this image out to the correct size for making a pattern. You may need to make it bigger or smaller depending on the size of your project or your personal preferences.
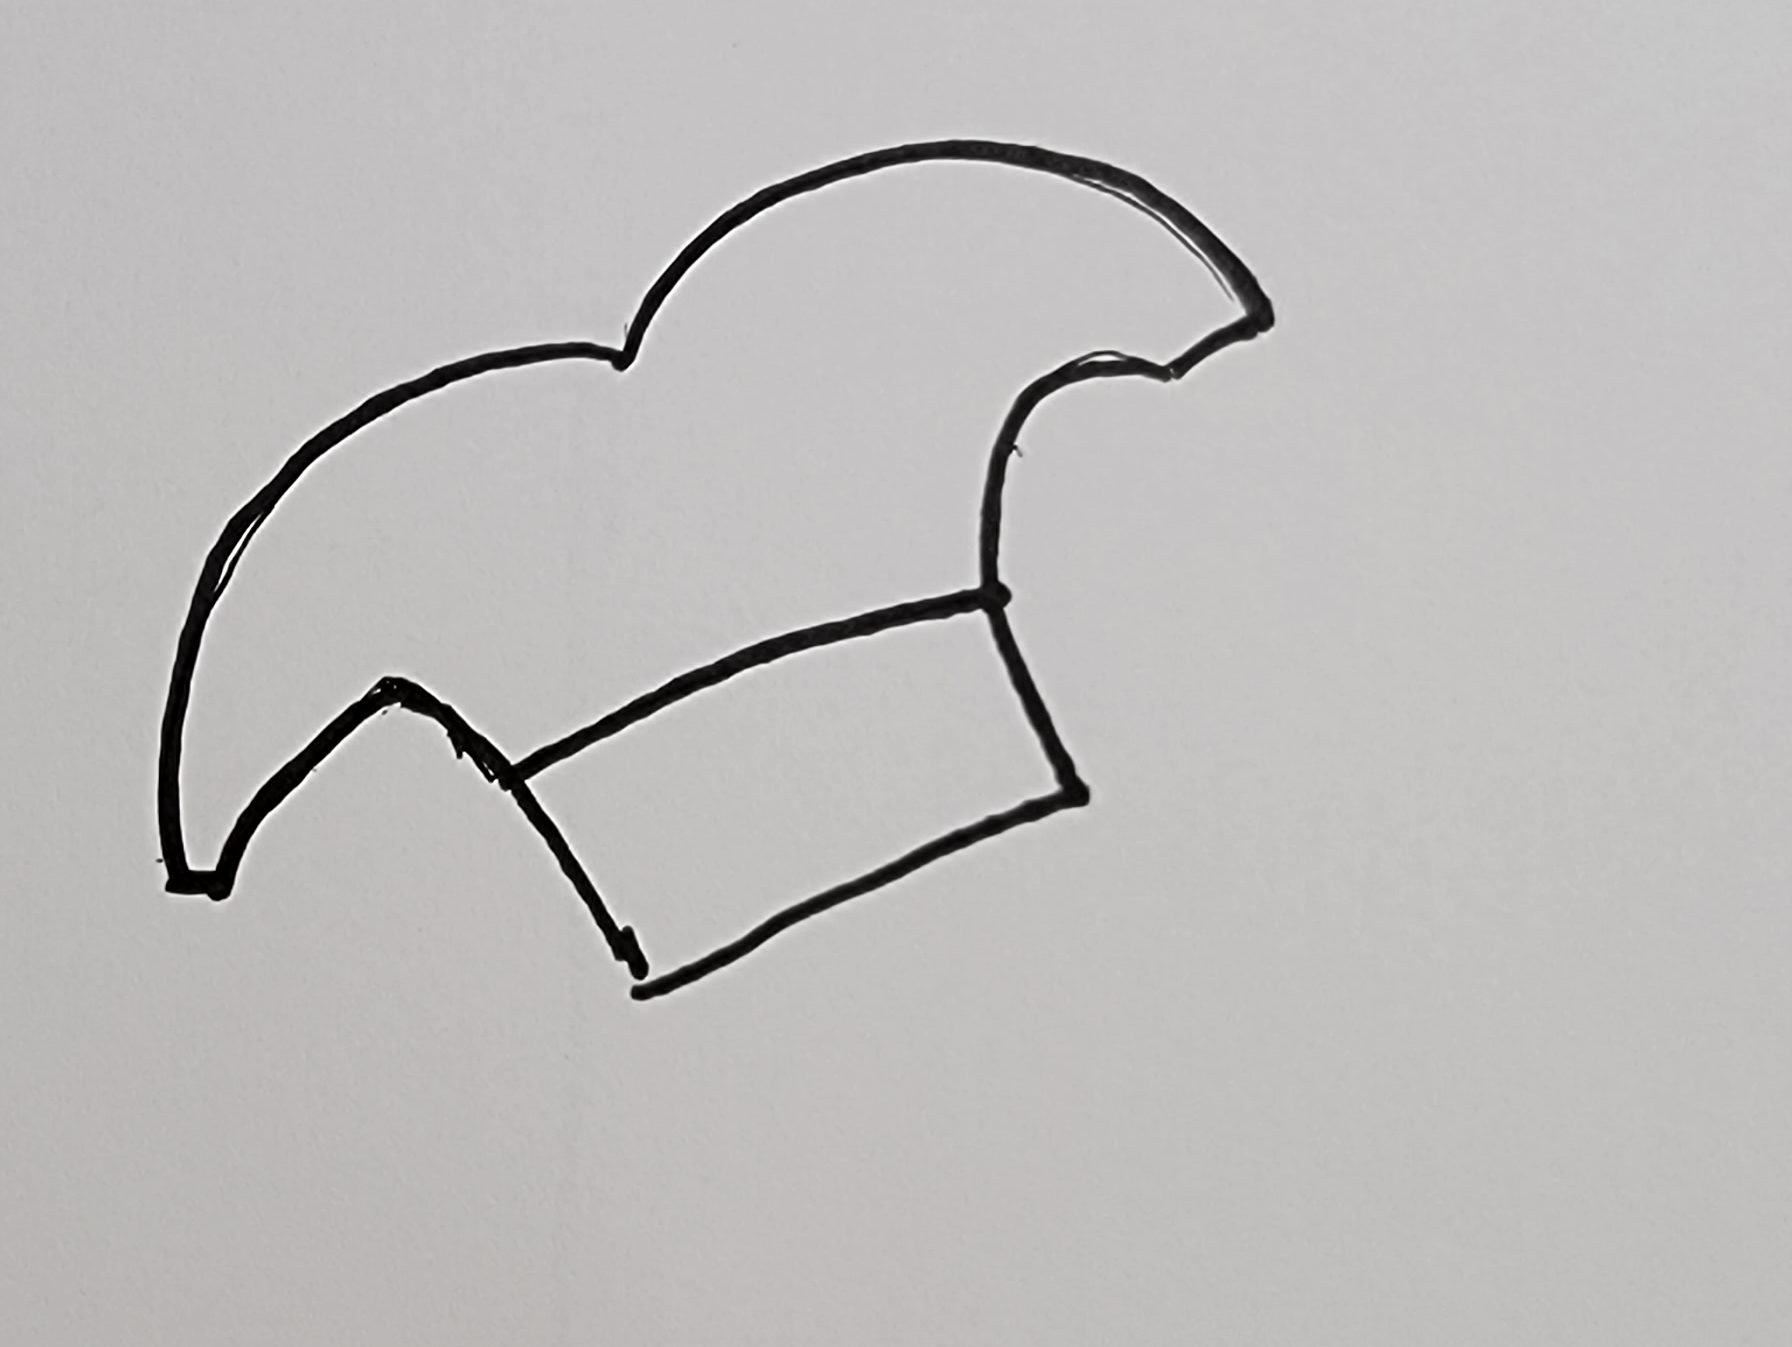
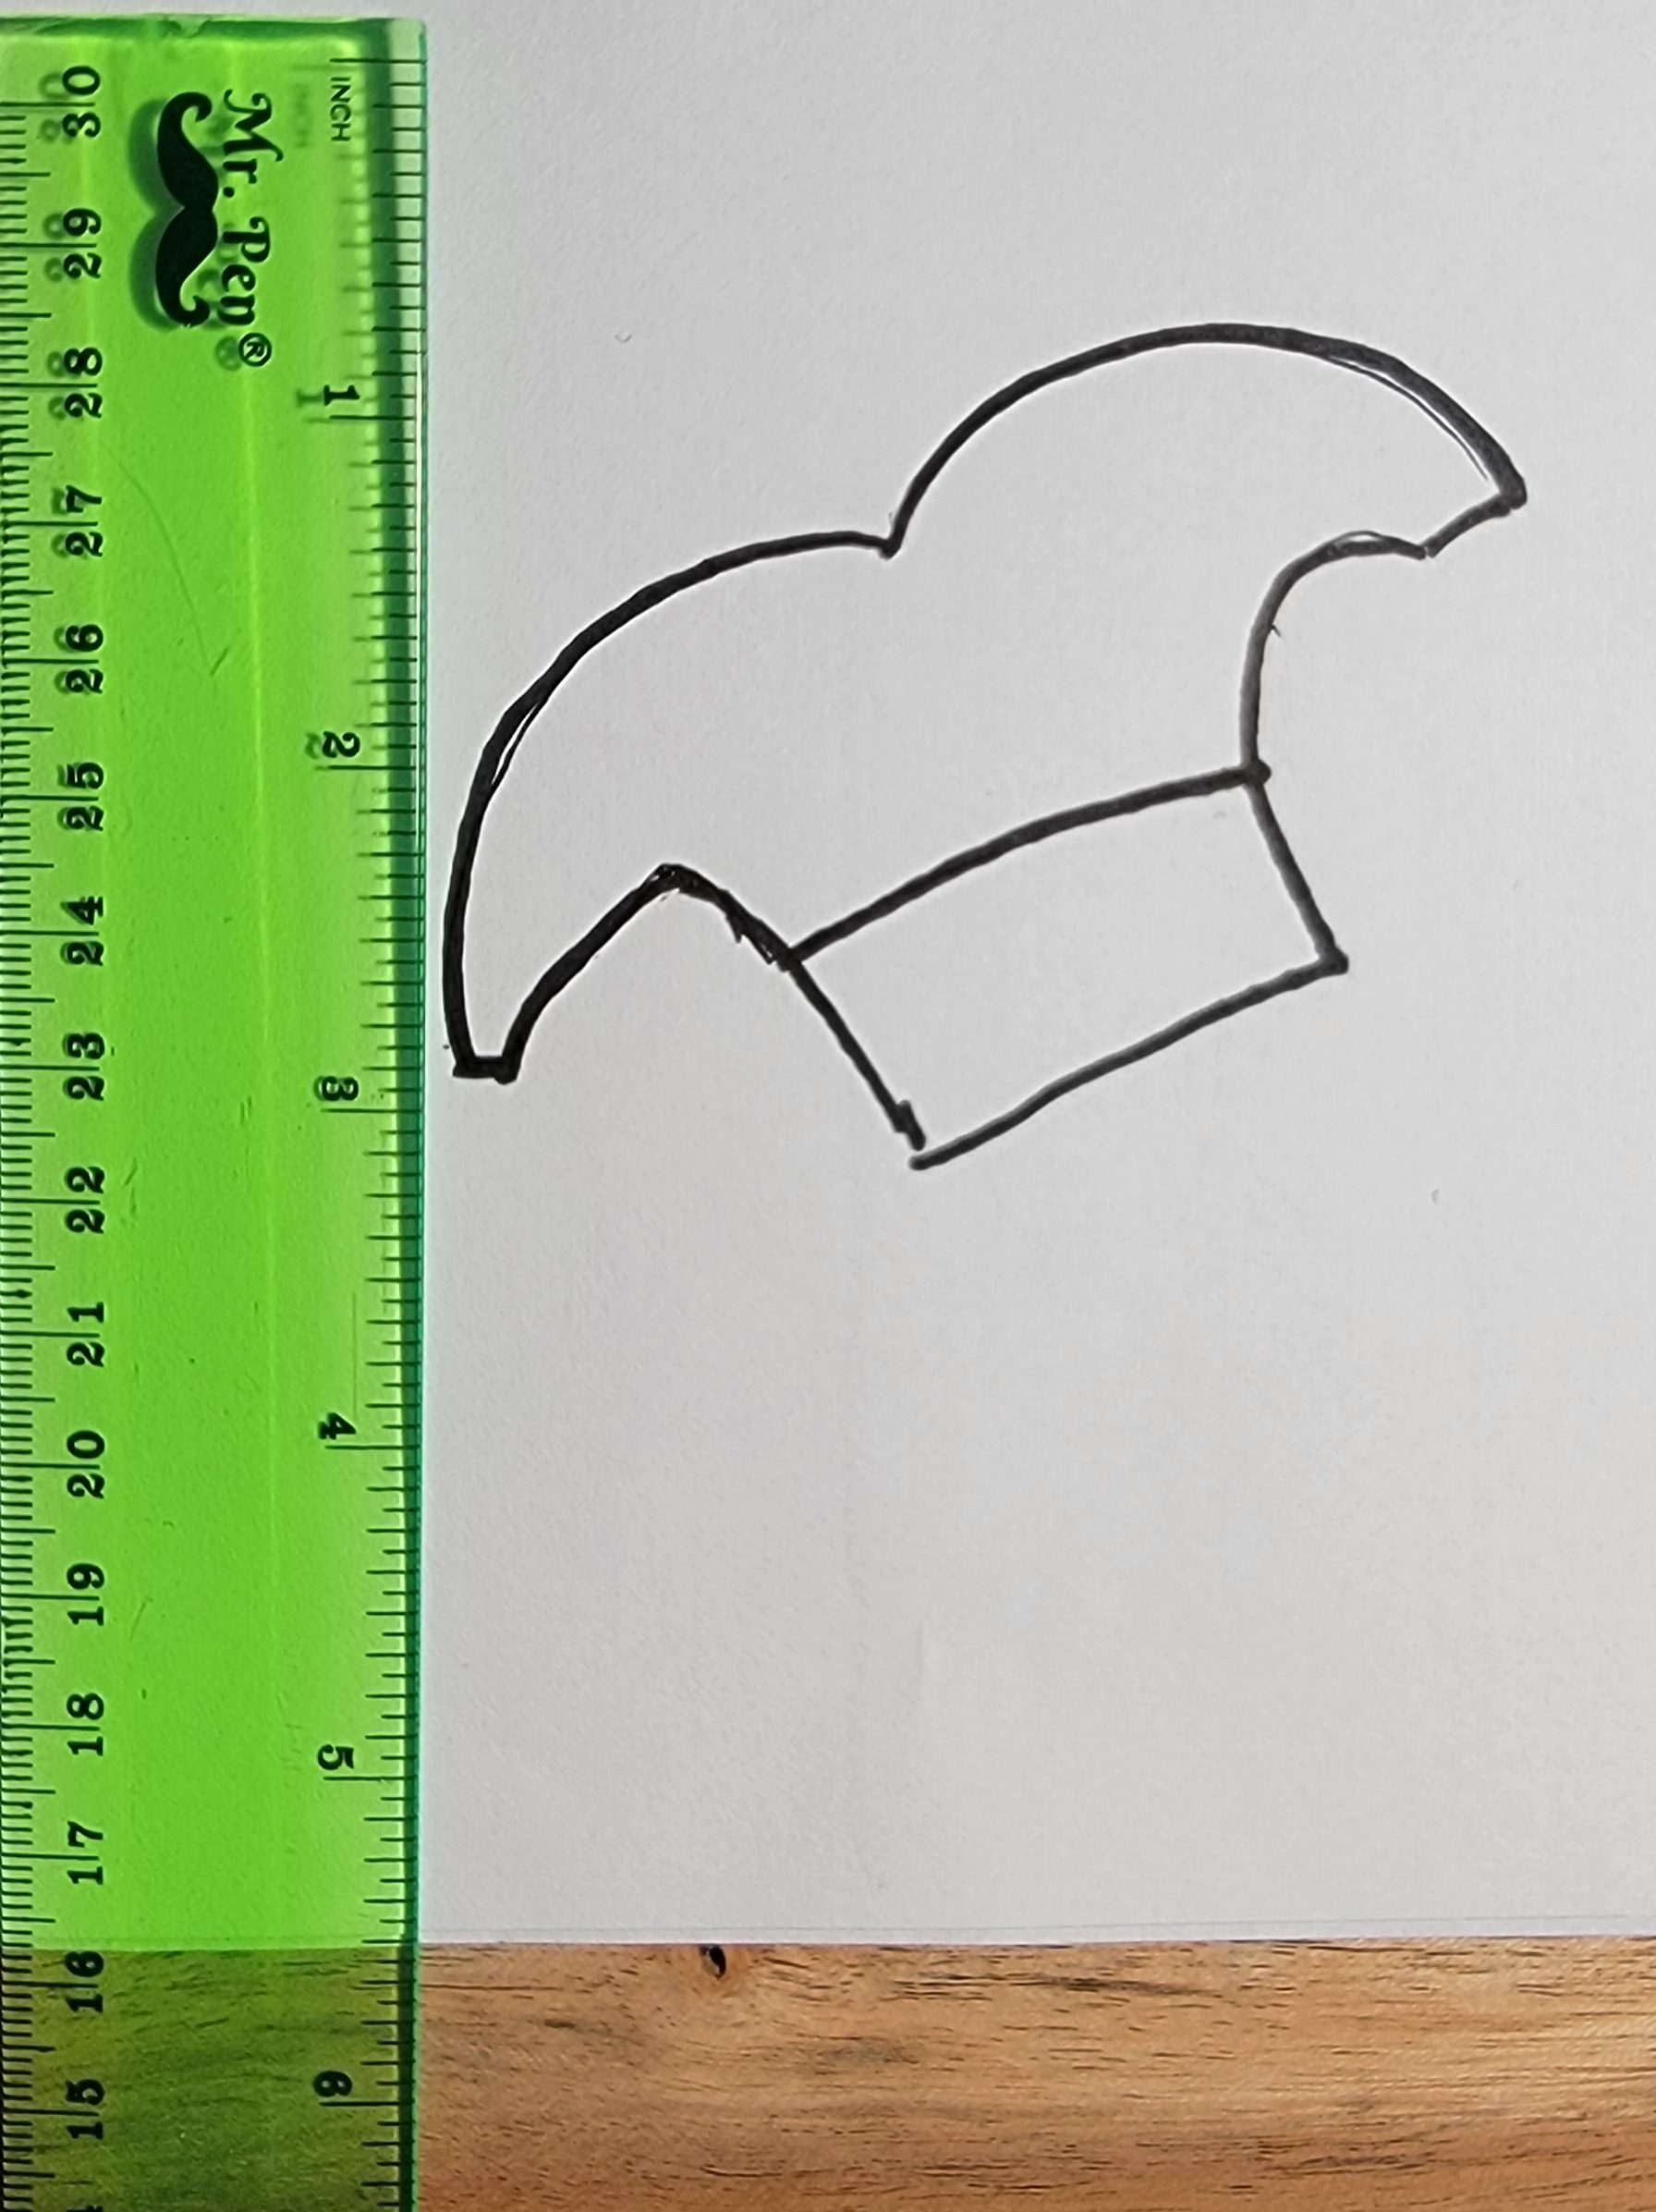
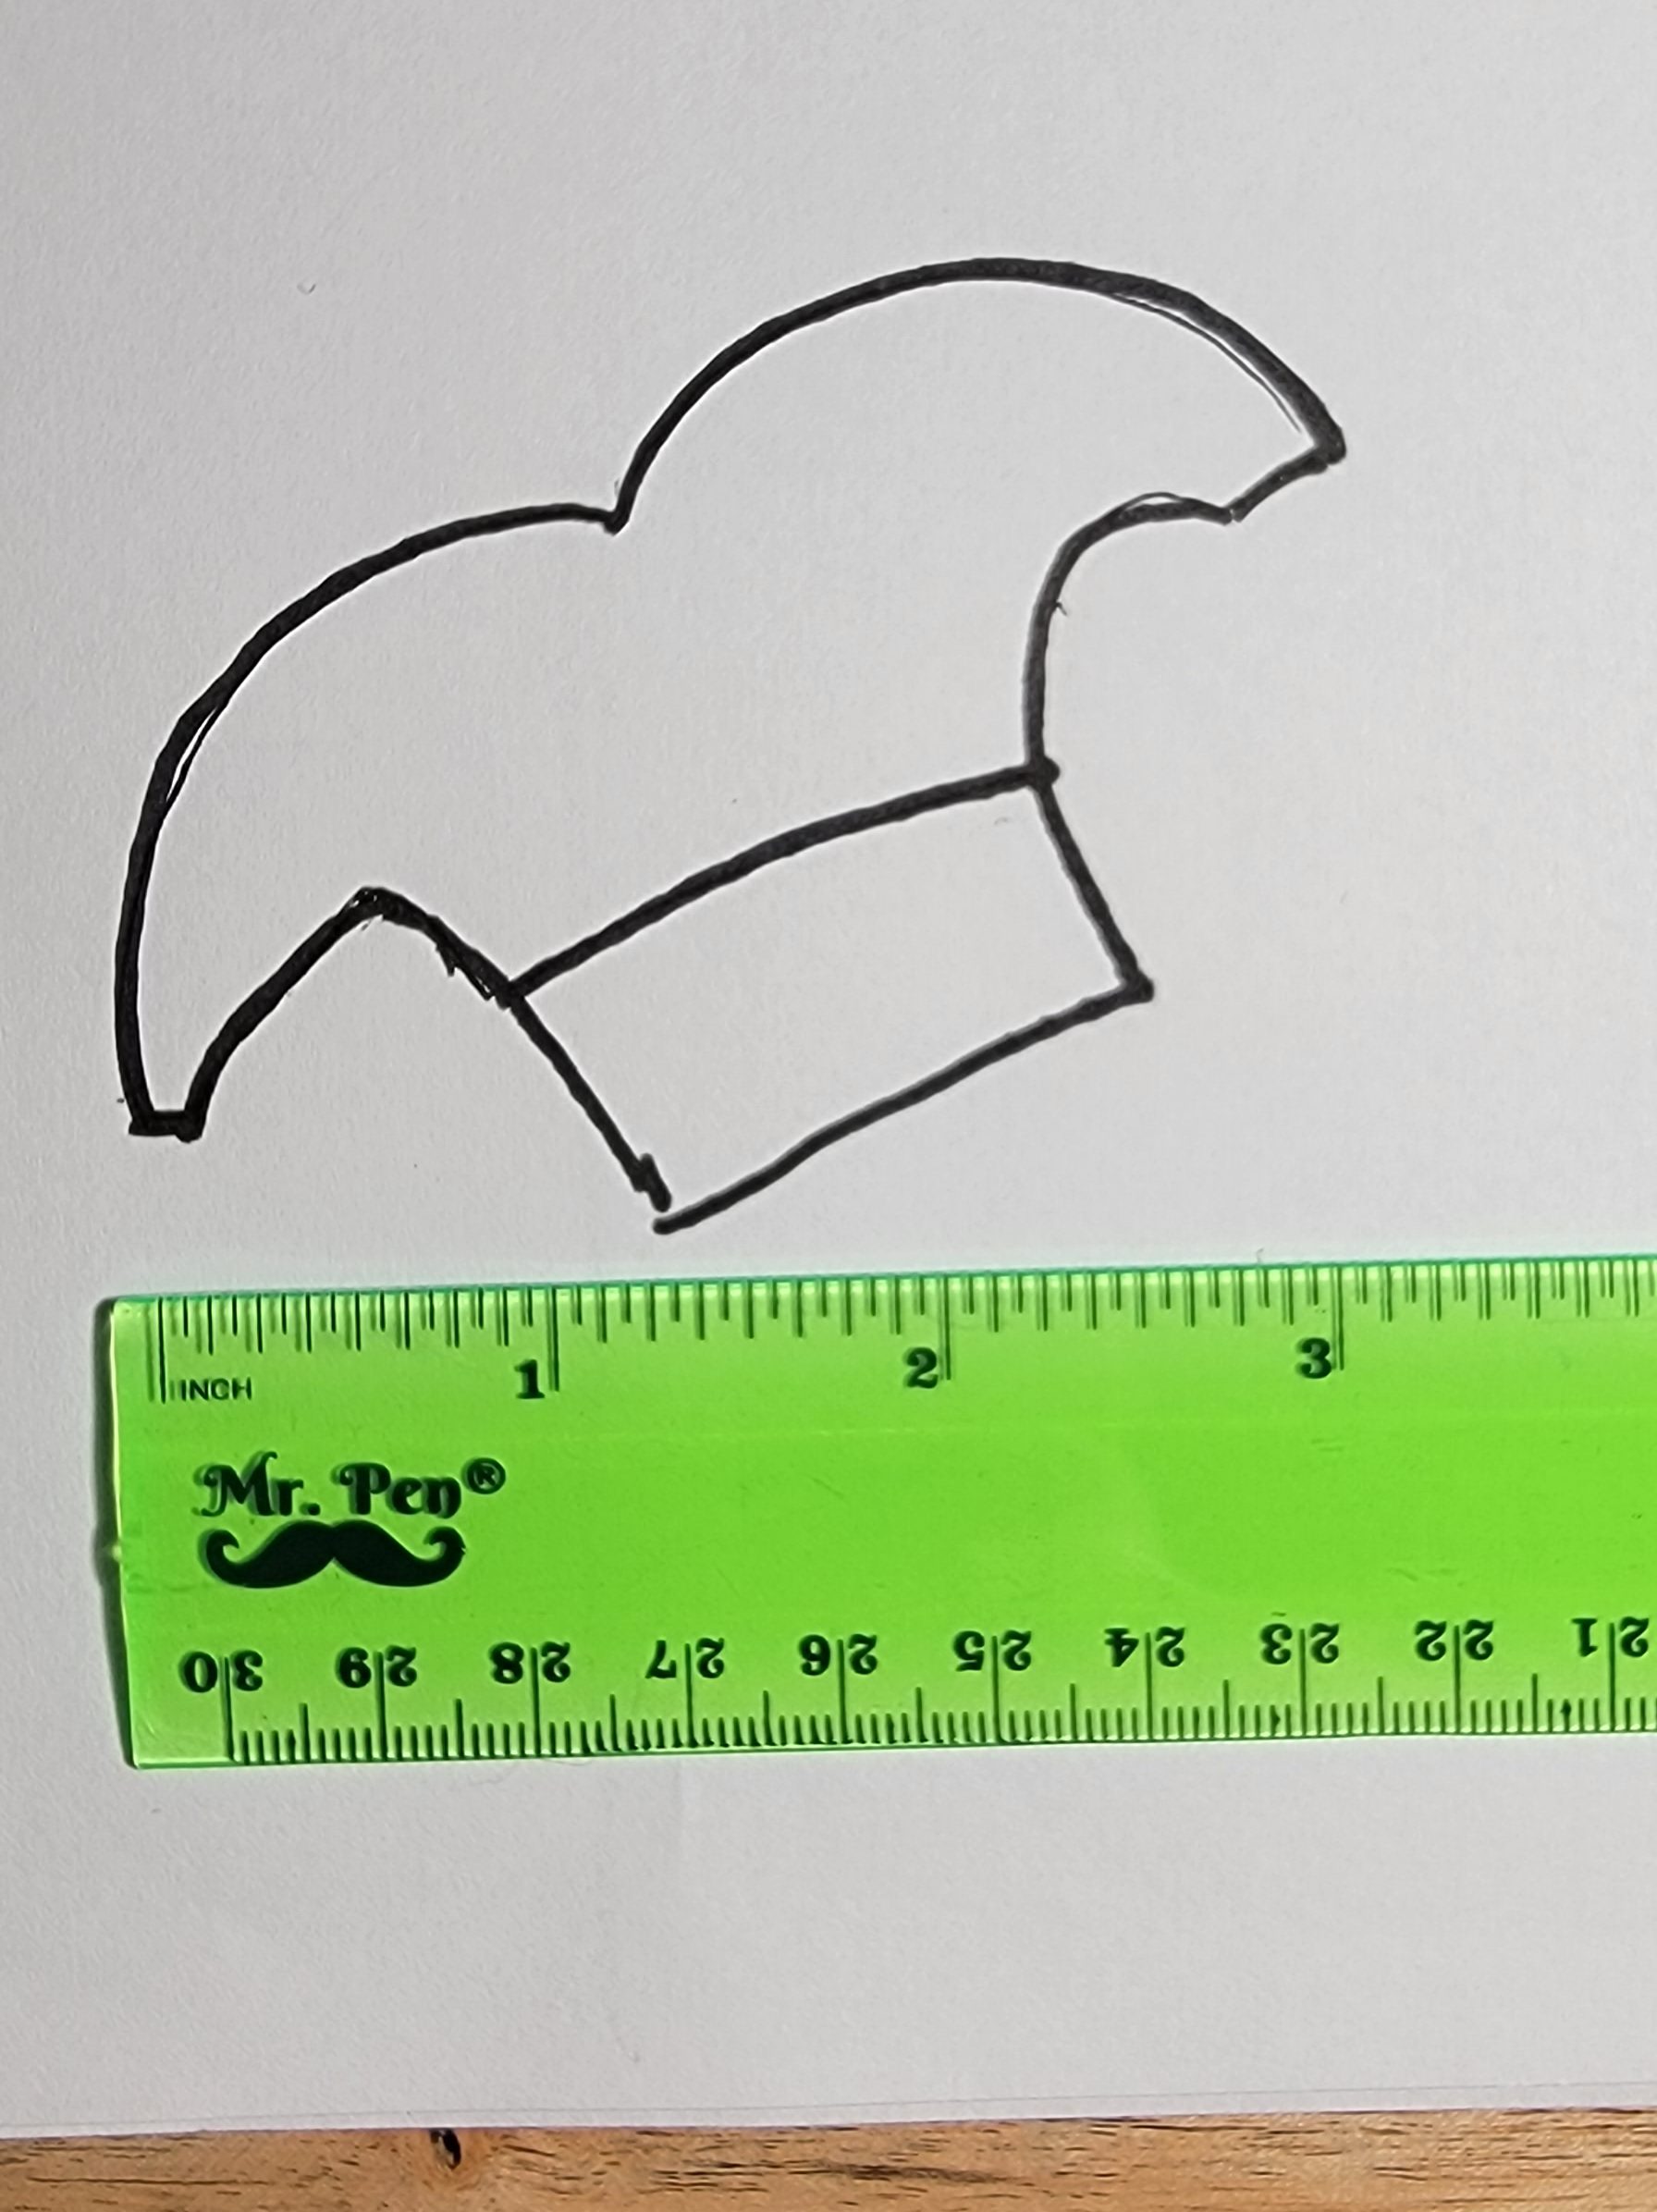
Take your piece of felt or fleece, and fold it in half. Cut out two hat pieces. It is asymmetrical on purpose. That is how the Jack in the concept art looks. I used felt for the Jack version hat and fleece for the Hope version. I found that the fleece holds it shape better when stuffed, but both work fine.
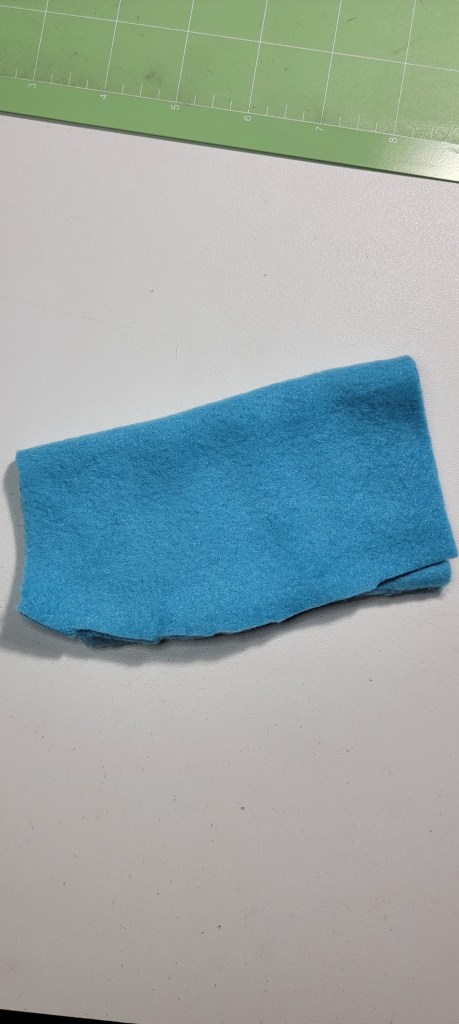


Once you have these pieces cut out, you will hand sew them together. Start at the bottom, but leave a space big enough to turn the hat right side out when you are finished. The hole left should be big enough for stuffing. Think of sewing this like a pillow where you have to turn and use the hole for stuffing.
Once you are done sewing, turn your piece right-side out. It will help to use a chopstick or stuffing tool to poke out the points on the ends. But be careful not to stab through your material.
Stuff your hat.
You do not need to stuff it as tightly as you did your crochet. But you want it to be stiff enough for the hat to stand when on the head.
Sew up the hole you used to turn and stuff through.
Next, glue the pom poms onto the end of your hat.
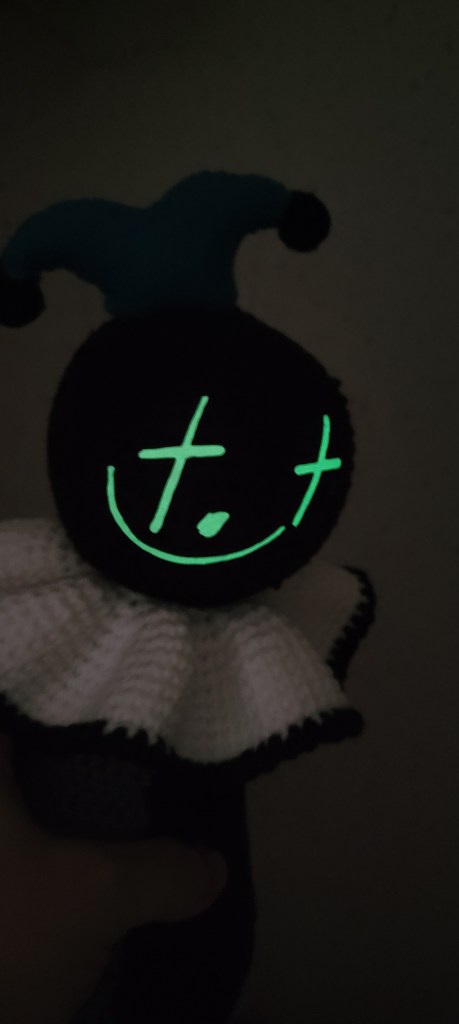
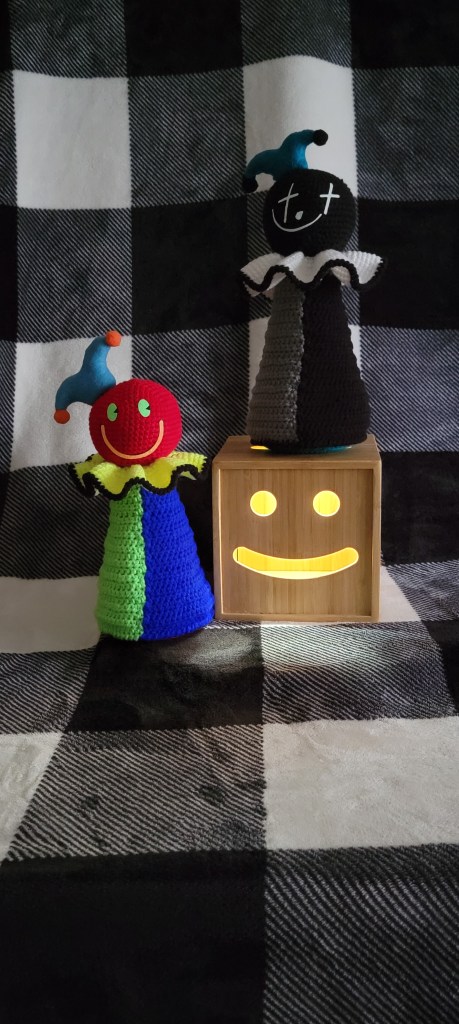
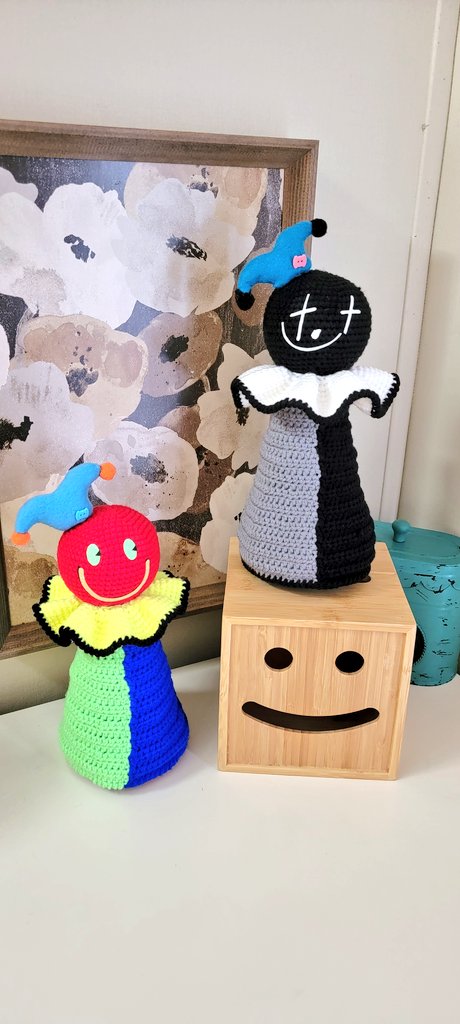
The hat is now complete. This is where you want to find a good placement on the head. Then, simply hot glue it to the head. Use this photo as a guide for placement.

That is the end of Step 6! Next, we put on the face.
Step 7
Now, you get to be an artist. Below I will leave you the template for the faces I used, but it is up to you how you want to apply these faces. Cutting out felt or foam and gluing the pieces on will work. If you want to import them into your cutter like Cricut and apply htv faces that will work. If you love to embroider, use the template and get the faces on that way. I think you could use paint or a paint pen and apply the face. Don’t be afraid to try new things. If you want to practice before you put the face on, simply lift up your doll’s dress, and try there. No one will see it…only you will know it is under the dress.

I cut these faces out at 2.5 inches in width to apply them to my doll head. I also cut the faces apart as I applied the htv. Working on curved surfaces gets tricky.
The End of Our Project
I have really enjoyed making this pattern for you, and I can’t wait to see what you make! Remember to tag your posts with #jibcrochet and tag: @army_mellissa and @mellmakes on Twitter. You can also tag mellmakes on Instagram.
If you like this project and want to support future projects, consider donating a ball of yarn at: https://ko-fi.com/noonabearcrafts. I use all donations on Kofi to fund projects.
Again, thank you for following along! As always, if you have questions, leave them here, on Twitter, or on Instagram and I will try to answer.